Would’a, Could’a, Should’a

Believe it or not, I’m still wrestling with the cables connecting my CB and GMRS radios to my tailgate antenna mounts. I understimated what I was up against.

I learned the hard way that even the best CB and GMRS radios come with crimped RG-58 (PL-259 to SO-239) cables. I learned how quickly you can blow through that kind of cheap cable, after failing over and over again to get a decent crimp while trying to shorten the cable. It doesn’t take long to find yourself staring at your internal trim panels, cursing at yourself, knowing you’d have to run cable again. I decided I needed to get a quick lesson from an expert, to get up to speed.

I drove to The Ham Outlet in New Castle, DE, to ask for some advice, and to buy whatever I needed to get the job done. I didn’t expect the level of expertise and selfless mentorship those guys offered. For every question I asked, I got a lesson. It was an incredible experience. I walked away with some valuable knowledge, and the right RG-8x (PL-259 to SO-239) cable with soldered connectors, and a hand full of RG-8x connectors, so I can trim the wires down once I ran them again.

Sounds like a lot of work, but I really want the cables to be run properly, to avoid any interference or noise. I learned it is OK to run cables for both the CB and GMRS along the right side of the Jeep if you’re only going to run one radio at a time. The cables need to run through the CBBAR, through the side trim panels, through the tailgate, and to the Teraflex dual antenna mount.

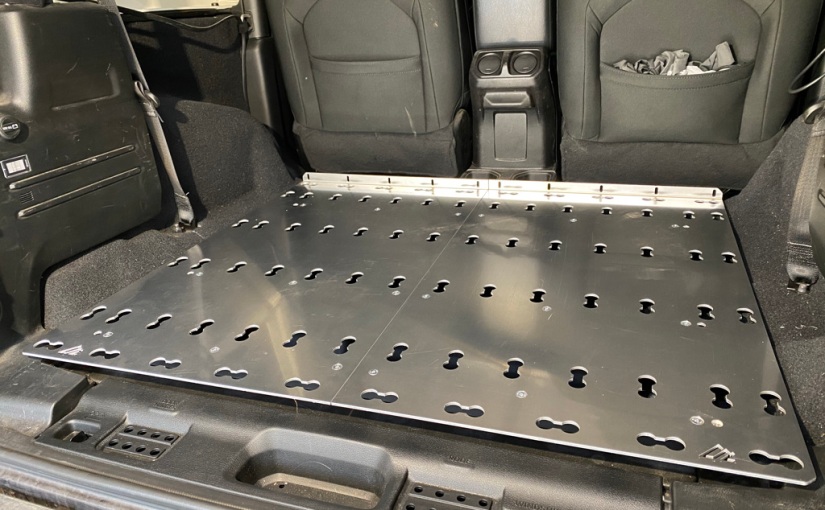
I have power cables running along the left side of the Jeep. This includes Dometic’s hard wire kit (to power the fridge), and wiring for the rear facing LEDs. Once I have the storage drawers installed, I’ll have to build a power station that will mount my PBL-40 battery and my 150W pure sine wave power inverter. Those wires will run along the left as well.

So why does it seem like I’ve been doing this wiring for so long?

Part of the reason is that its friggin’ 20 degrees and snowing, and I can’t work in the garage because I decided last week to install my 35s. So my Jeep is too tall to get through the garage opening.

Another reason is that I still have not run the extended wiring harness that I created from the ARB Twin Compressor (that I recently mounted under the passenger seat) to the Jeep’s battery. So if that was done already, I could have aired down my tires to get the Jeep into my garage.

Yep, CB/GMRS wiring would have been done by now. Heck, all other wiring work would be done by now. So when will I have the ARB Twin Compressor wiring completed? I dunno, its cold and snowing…

I Got Big Boy Pants On

I never understood what the big deal was about having 35s instead of 285s that Rubicons come with. After getting up to speed on gearing and tire size, I couldn’t imagine why anyone would want to get away from what Jeep considers the perfect combination. Yet almost everyone I know has 35s or bigger. Heck, some of my buddies have 40s, and they’re running their stock 4.10 gearing. That’s insane!

Having upgraded to Rubicon axles in November, I have 4.10 gearing and lockers. So I knew that moving from 285s to 35s would subject me to compromised gearing, and the sluggishness I felt when I moved from 245s to 285s with 3.56 gearing. I knew I would lose 8th gear. But I decided to do it, after realizing that I have so much fun wheeling with the Cumberland Crawlerz. I’m able to keep up most of the time, even when I’m lured onto Black trails (even though I only find out afterwards).

I knew that in order to move to the next level, I needed to upgrade to 35s. As I prepare for my June trip to Moab>Rubicon, I knew I needed to bite the bullet. The sooner the better. This way I can wheel with the group and get used to the bigger tires, different accelleration, braking, steering, etc.

I wanted steel, since I needed the comfort of knowing I wouldn’t end up with catastrophic failure at Rubicon. I mean, yea, so aluminum looks great, and they’re lighter. But they get scratched up easily, you can’t bend them back into shape, and you can’t just paint them. I started to price tires and wheels, and fell off my chair a number of times. I ended up buying a used set of tires and wheels from a buddy. He was moving away from steel and and onto bigger tires.

He sold me a set of five Pro Comp 97 steel wheels (17×9), and four Nitto Grappler MT tires (35×12.5×17). The tires have more than half the tread left, and I was able to find a fifth tire, though its a Nitto Ridge Grappler (35×12.5×17), on Facebook Market Place for cheap. Total cost came in at under 1/3 the price if I had bought it all new. Quite a steal if you ask me.

I will no longer walk up to my buddie’s Jeep thinking “Man I wish my Jeep looked like that!”

Wait. Yea, I probably will keep saying that. Since he moved to bigger tires. #sigh

Well I finally decided it was time to get the 35s installed. A neighbor helped me schlep the five wheels and tires to the local Monro service center. I had five new Chrysler 433mhz TPMS units. I asked Monro to install them on all five wheels. They were done installing the TPMS and fifth tire, and balancing, in under two hours. After they took it for a spin, I hopped in and rolled off into the sunset.

The Jeep felt taller and a bit sluggish, as expected. But I knew to expect that, and I know I’ll need to re-gear to 4.56, or more likely to 4.88, before the June trip.

Happy to report SUSUSUCIO no longer looks like Mr. Universe with chicken legs.

Rugged Ridge Max Terrain Fender Flares

Parent Company: Omix-ADA
Company: Rugged Ridge
Retail: Quadratec

I get a lot of questions about the fender flares on my Jeep. They are Rugged Ridge Max Terrain fender flares, sold by Quadratec. They sit a couple inches higher and they stick out 1″ farther than the stock fender flares. This is great when you run 35″ or higher tires.

I like that they’re made of plastic, so while they might scratch in June when I’m scraping up against boulders and trees at Moab and Rubicon, they’ll bounce back. Metal will scrape up but they won’t bounce back, so you’ve got a more serious problem.

So why am I posting about them? Well, I found several issues with the front fender flares that I think folks should know about before spending $599 on the full set. The rear fender flares are fine, no complaints.

First, the Daylight Running Lights (DLRs) don’t come with wiring instructions, which is an issue given the number of Jeep model and lighting variations. I have a Sport S which does not come with DLRs, while other models or variations might. So when these DLRs are installed, there is one male and two female wires, without a clue what to do with them.

I called Quadratech, and after waiting over a month, they finally got the manufacturer to send me a replacement set of DLRs. Those failed too, since they were the same DLRs, with the same issues. So I called again and have been waiting for a response for a few months…I continue to wait.

Second, the DLRs are not sealed properly. After a few weeks they started to get filled with water droplets. The DLR function eventually failed on both. The signal light function still works, the yellow light flashes fine when I’m turning. But the DRLs are dead.

Second, the DLRs don’t align with the fender, as you can see above (mine) and below (screenshot from their video).

Third, probably the most important, is that the front fenders pull away from the body. This is because they were designed to ignore the two two clip holes that are positioned by the Jeep’s side vents. So the back side of the front fender flares are not mounted securely. I get that the fender flare sits much higher than the holes were meant to accommodate, but why use all the clips but those two by the Jeep’s side vents?

Rugged Ridge would do well to address the above issues. Until they do, I wouldn’t recommend these front fender flares to anyone. The rear fender flares are fine.

American Adventure Lab – Part 2

I installed the American Adventure Lab platform today. Its a pretty straight forward install, though on two door JLs there are only two of the three required holes on each side of the cargo area. That meant having to install the platform and drill the two remaining holes, then removing the platform, installing two netserts, then reinstalling the platform and bolting it all down.

I assembled the platform, and slid it into the cargo area. I bolted down the two rear most holes on the left and right, and gave them a little torque so the platform wouldn’t move.

Then I drilled through the two front most platform holes, using progressively bigger drill bits, so the nutsert could be inserted into the hole. The first bit was the smallest, it went through easily. The next drill bit was a little bigger, it also went in easily. When I used the biggest bit, I felt a lot of resistance, on both the left side and right side holes.

I removed the platform to see what was happening. As it turned out, there’s already a threaded hole in precisely the right spot. When I reported it to the company, they seemed surprised, but relieved that my accuracy was perfect. I’m guessing most customers won’t be as precise, and would probably force the drill all the way through. Good thing I stopped when I suspected something was wrong.

Now that I knew the two remaining holes were there, and already threaded, I put the platform back in, and torqued down all six bolts. The platform is very strong, so glad I went with American Adventure Lab’s kit rather than the wooden Goose Gear kit. This platform will last as long as the Jeep, and I’ll never have to worry about cracks in the coating leading to issues with the wood its made of.

Now that the platform is in place, I attached the eight Single Stud Tie-Down Rings. I never knew these existed. As it turns out the holes on the platform are L-bracket type, which uses these things. Brilliant design. Press the ring down, exposing the stud, insert the stud, slide the round base of the stud to the center of the peanut shaped hole, rotate ninety degrees, and release. Brilliant! So many options!

Now that the platform is in place, I can start planning on installing the twin drawers. This part requires partial disassembly, so I’ll wait until it gets above 40 degrees before I start on it.

American Adventure Lab Platform

I spent more than two months agonizing over what platform to buy (or make!) for my 2020 Jeep Wrangler Sport S two door build. Most of my buddies recommended Goose Gear, but 99% of them never bought or used that brand. So they were basing their recommendation on what they Googled or on some really expensive marketing campaign Google decides to SPAM you with during your browser session. So I started reaching out to folks who actually do overlanding, and the responses I got were pretty diverse. Its out of scope for this blog post, but the take away was, don’t be fooled by fancy ads.

I looked into making a platform out of plywood. A buddy at work connected me to someone who has all the tools needed to cut a platform out of wood. I started to get large cardboard boxes from the local U-Haul, to create a template. I’ve got to tell you, trying to make a platform template out of carboard is about as much fun as having your naked body dragged over broken glass.

I was about to give up and splurge on a boutique priced Goose Gear platform. But I couldn’t make myself pull the trigger. I don’t mind paying more for good stuff, but I think its stupid to spend $650 for a piece of coated plywood. Not my idea of rugged and reliable, given how coatings can fail, and how even the best coated wood won’t do well if moisture gets through a crack. There just had to be a better solution out there, so I kept looking.

Then one day one of my buddies sent me a link to American Adventure Lab’s solution. After beating my head on my desk for not finding them when I was searching, I took a look at their products. Well hello there! Their platform is made of thick CNC’d aluminum plates. Now that is durable! They offer their platform solution in bare aluminum (my preference), as well as some powder coated colors. They have their own proprietary mounting solution, but you can also buy tie down adapters.

So I ordered the platform in bare aluminum, and I added 8 of their Single Stud Tie-Down Rings. I plan to screw down my IronMan4x4 twin drawers, and I plan to use the tie down adapters to add some reinforcement, and to secure some other stuff that I plan to schlep on my June trip to Moab>Rubicon. The box arrived today, and as expected, it was at most 30 pounds unwrapped.

The platform being the foundation to my build, and the time I spent researching, collaborating, whining and bitching, etc., I don’t mind saying I was excited to open the box. The product was very nicely packaged. It came with some very well designed instructions, technically accurate and in color! Wow, this is already exceeding my expectations!

Here are some pictures. I’ll post again once I start the install.