Shout out to Ron and his team at Ridgeback Guide Service. I joined them for an overlanding trip a couple months ago. I made a couple critical mistakes, and learned that I needed to step up my game when it comes to eating on those kinds of trips. Being hypoglicemic, eating right is critical for folks like me. During the trip, we were told that we get a 10% discount on our next purchase at Main Line Overland (my favorite overlanding shop). So guess what I bought. 🙂

My Goose Gear Camp Kitchen and Double Drawer module arrived today! With a wait time of 14 weeks, I tried not to think about it, then I realized I needed to make sure I didn’t miss delivery. So I called Main Line Overland, and they told me it just came in! I empted the Jeep and headed there to pick it up. It came in a huge crate, but luckily the two modules fit easily in my Jeep, with plenty of packing material to avoid any damage.

I ordered some Pelican TrekPak dividers for the drawers. The dividers come in pairs and can be trimmed. Bought a pair of 23×4.25″ divider for the top drawer, a pair of 23×7″ for the bottom drawer, and some quick release clips to hold it all together. Once it’s all trimmed and installed, I’ll update this blog.


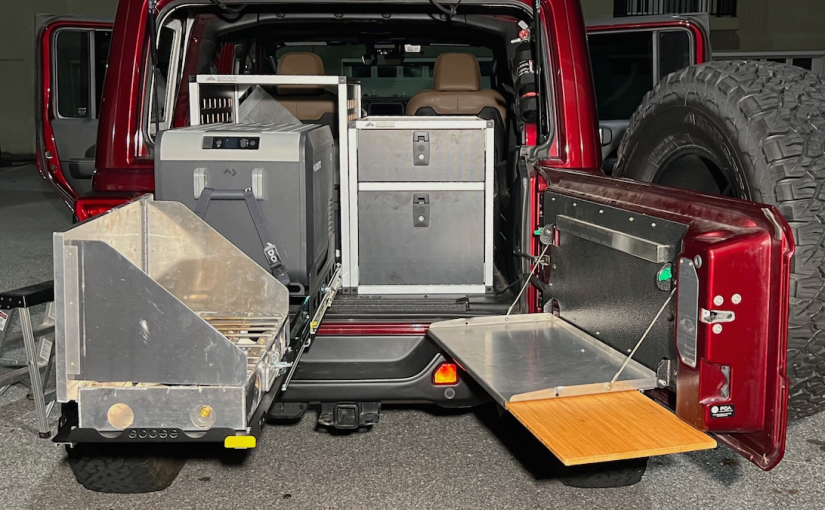
It took me a couple hours to get it installed, and it’ll take me a couple Aleves to survive the expected muscle ache in the morning. Installation went smoothly. I’m very happy with the result. I did have a few observations that I thought might make good filler on this blog post. Keep in mind the tailgate table was already installed, and I already had a stove and fridge.
First, the mounting brackets for both modules had holes that were the exact size as the 1/4″x20 threaded holes on my Goose Gear platform. I expected that, since the cool kids on YouTubers suggested we drill out the mounting bracket holes by 1/16″ or so. I’m so glad I did my homework first, that made all the difference in the world.
Second, I have to find another place to mount my 5LB propane tank. I’ve been mounting it on the spare tire. But now that the stove is on the left side, I need to find a good quick release so I can put the propane tank on the ground near the stove when I’m cooking. I definitely don’t want to run a long propane hose across from the spare to the Camp Kitchen.
Third, the stove drawer can hold a Partners Steel 22″ stove. There’s maybe 3/4″ space around the stove, so I need to get some flat straps to secure the stove when I’m on the road. The stove slider has holes, I guess to permanently mount the stove. But after my last outing, where half my food fell into the stove, I can’t take the risk of not being able to clean the stove.
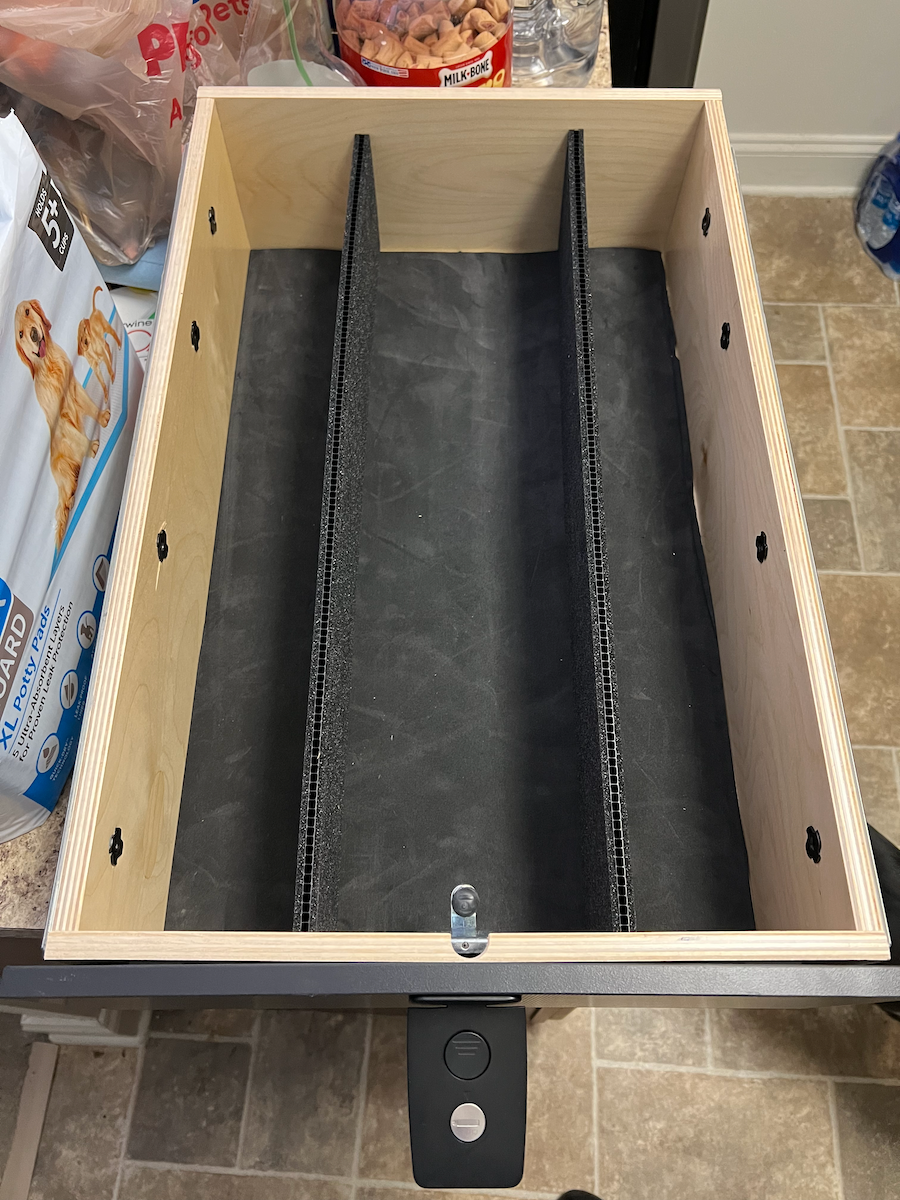
Fourth, the drawers are extremely well made. They’re 28″ deep, and the bottom and sides are made of 3/8″ A-grade finished plywood. Experienced overlanders use Pelican TrekPak dividers to secure whatever they store in the drawers, so I ordered a kit. I plan to put my plates, utencils, cups, etc., in the top (smaller) drawer, and I plan to put bigger kitchen stuff like pots and pans, coffee maker, etc., in the bottom drawer, along with some dry foods.
Fifth, I was both happy and sad when I realized my Dometic CFX3 35 fridge fit perfectly on the fridge slider, without the insulating cover. I mean the fit is perfect! I plan to trim the insulating cover, since it’ll fit around the fridge, except for the bottom 2″ or so. I love the insulating cover, even if it’s a moot issue since I moved up to a 100ah LiFePO4 off grid power kit. But I still want to have the fridge insulated.
Winter is coming in a couple weeks, not sure yet if I’ll have a chance to give the kitchen a dry run. But since I’m moving to Arizona in the end of March, I’ll put it to good use out there for sure!
Update 20221221: I trimmed the pairs of TrekPak dividers to fit the drawers. I ended up ordering another pair of dividers per drawer. This way I can line the sides of the drawers. For the base of the drawer I took a tip from an overlanding buddy who suggested going to Hobby Lobby to get a 13″x36″x3mm roll of dense foam padding. It was more than enough to cover the base of the drawers. I’m not worried that I did a hatchet job on the edges, since they’ll be hidden under the dividers when all the work is done.
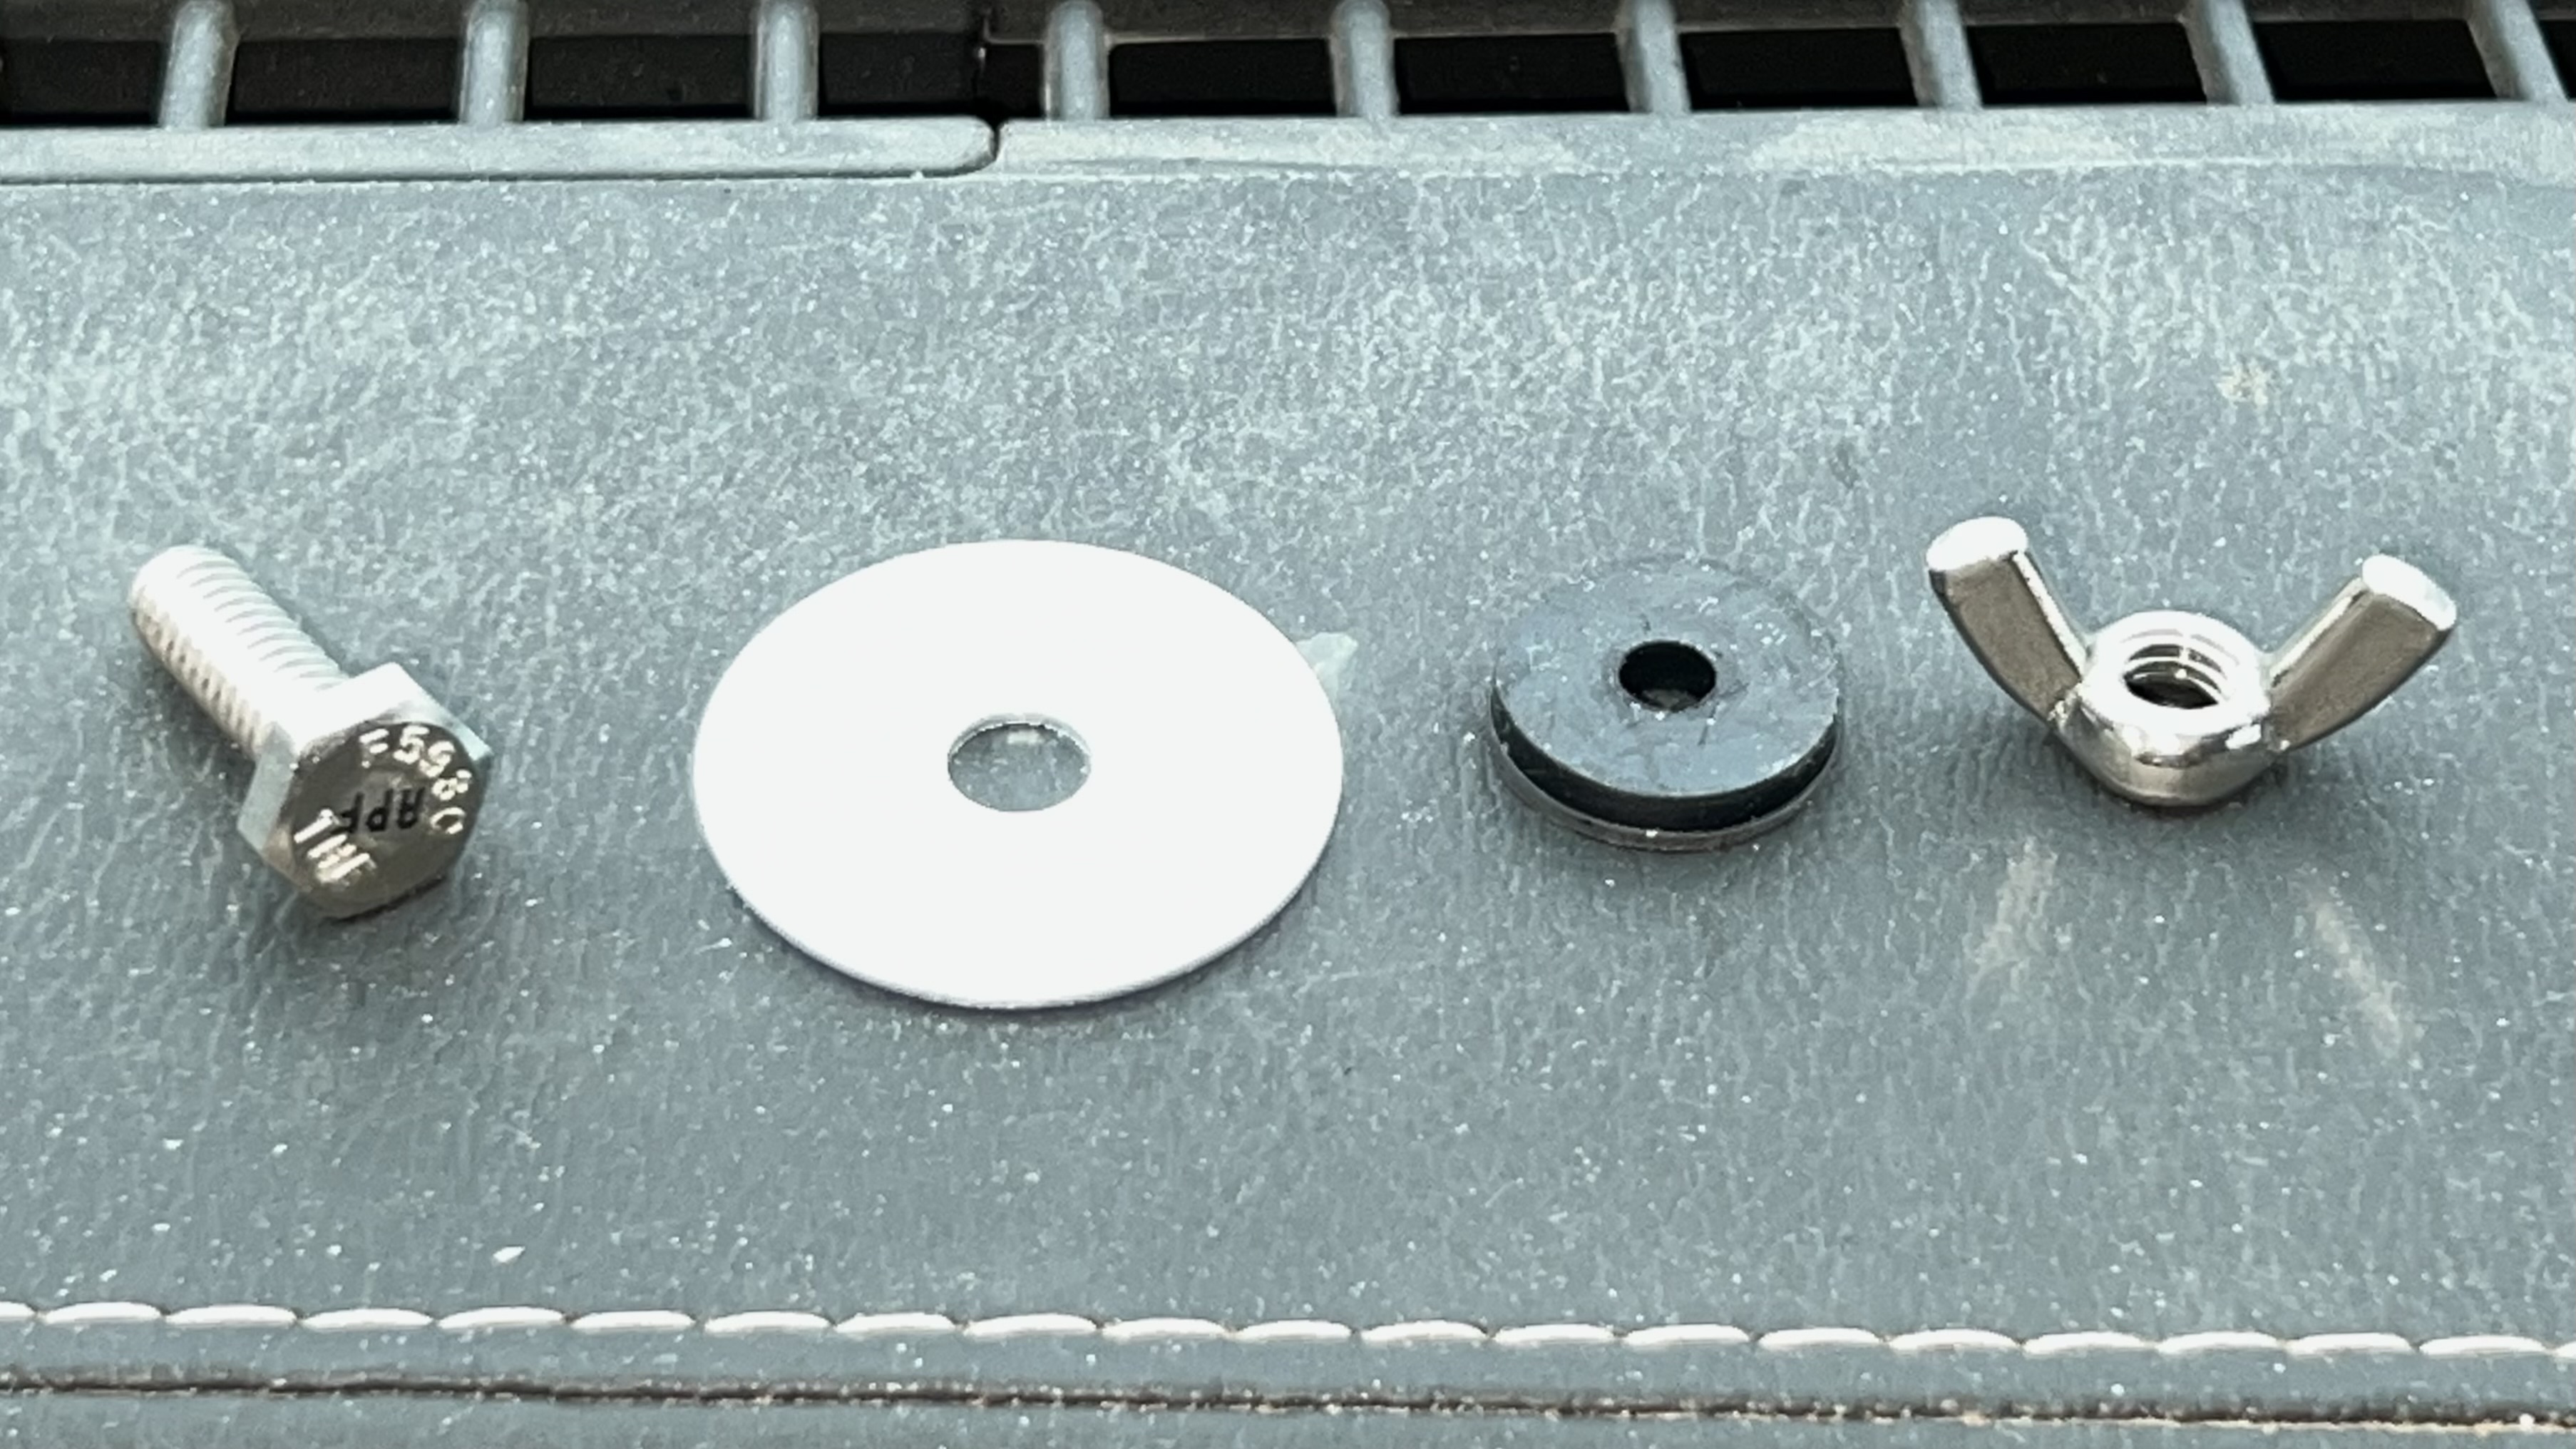
Update 20230102: I went to Home Depo and picked up some 1/4×20 stainless steel bolts, wing-nuts, and 1 1/4 washers. I also found the right plumbing washers to seal things. I used a pencil to mark the spots for the four holes, then I used a 1/8″ drill bit to start each hole, then moved up to 1/4″, and used a dremel bit to smooth the edges (which made the holes a tiny bit bigger than 1/4″ which was perfect).
I originally planned to put the wing-nuts on the top, but that looked a little cheezy. So I re-arranged the bits, and put the wing-nuts underneath (plenty of room). Once the stove was secured, I poured a cup of boiling hot water to make sure the stove is sealed properly. Boy I’m glad I took my time on this. 🙂 Shout out to Expedition Portal forum for the feedback from all the long time overlanders.