Colorado, Ralph, Yogi, and Bambi

My plan was to do Black Bear Pass, Holy Cross, Poughkeepsie Gulch and Imogene Pass. Well, Black Bear Pass was a nothing burger, closed hopefully only for the season, but likely forever. Shit.

As I posted on Tuesday, the San Miguel County Sheriff wasn’t able to get Black Bear Pass open for the season, I decided to do Imogene Pass on Friday, Holy Cross on Saturday, and Poughkeepsie Gulch on Sunday.

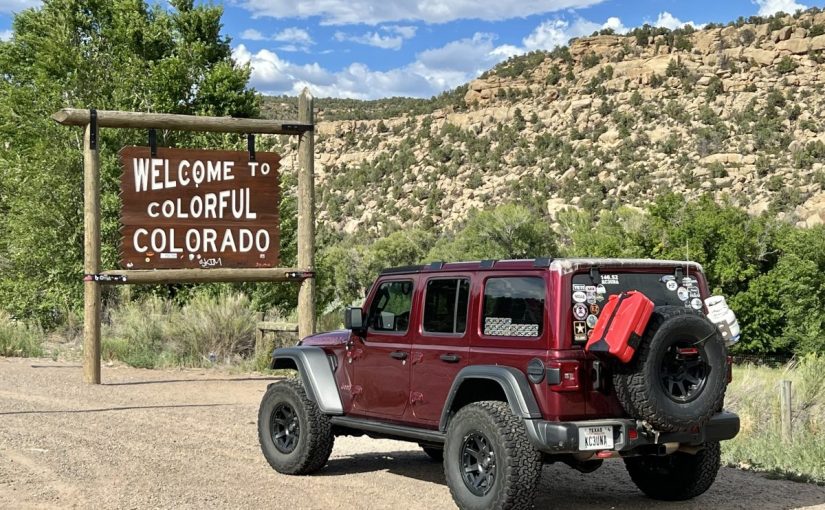
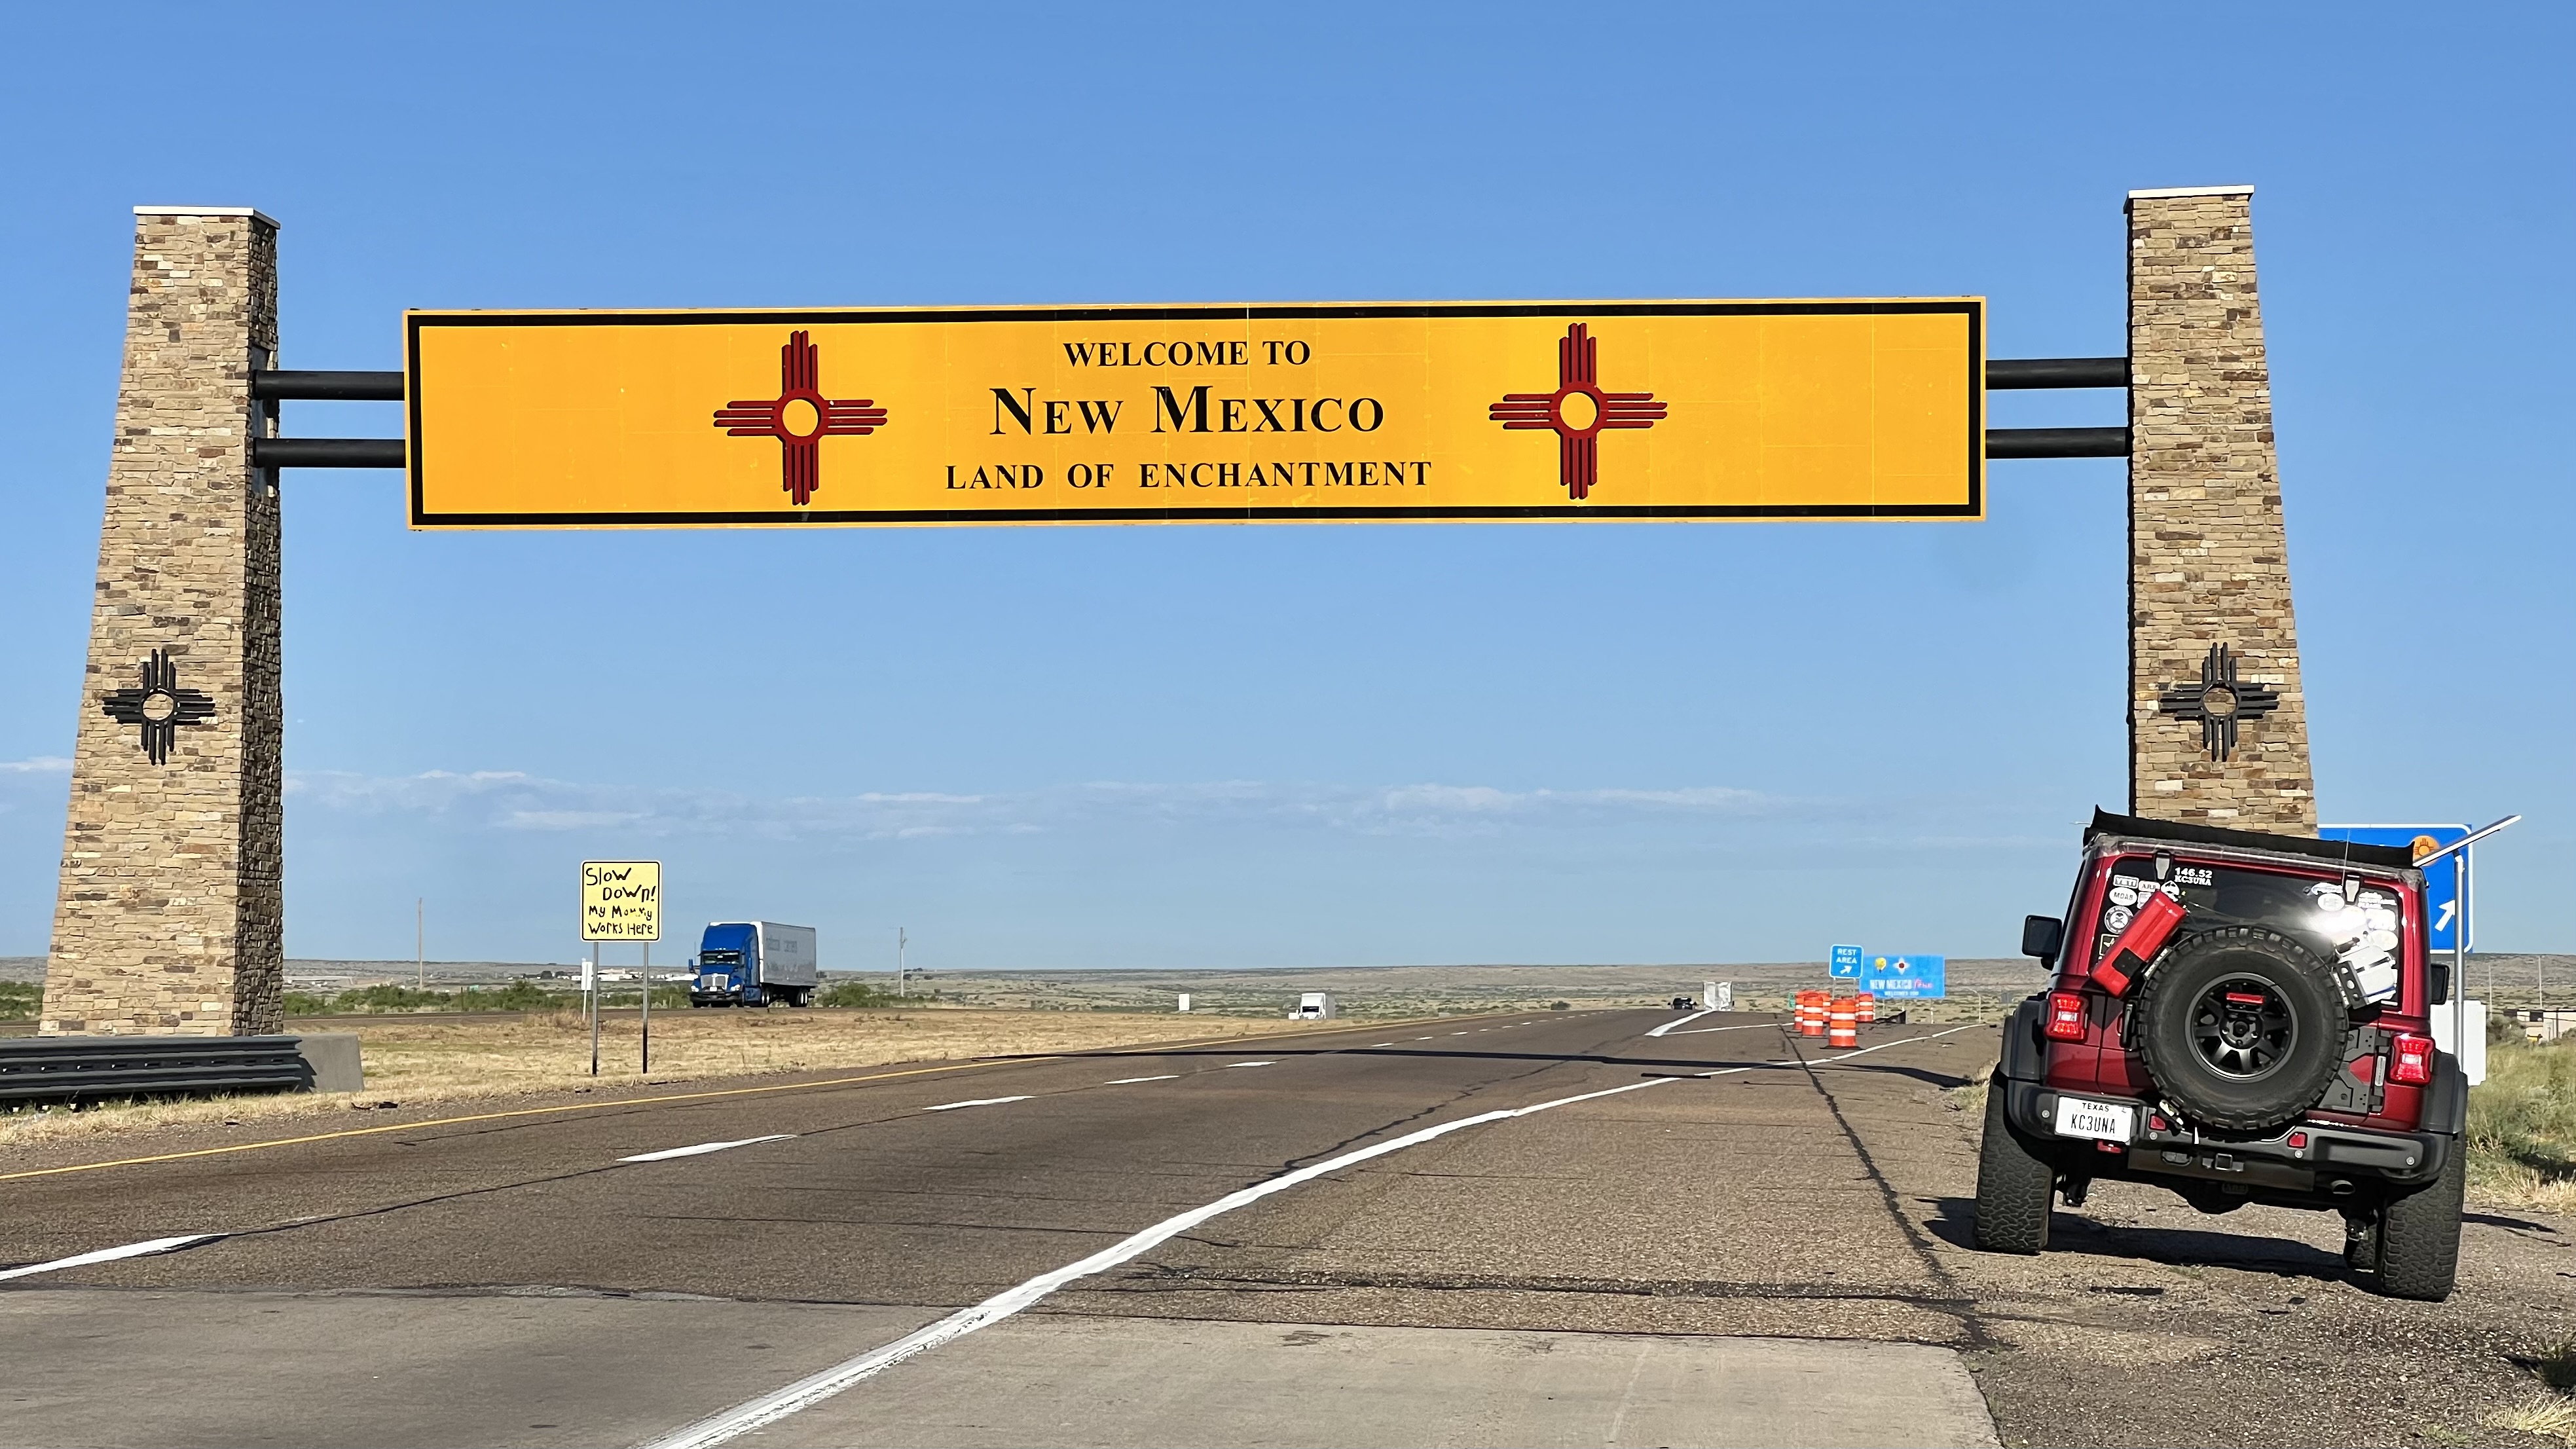
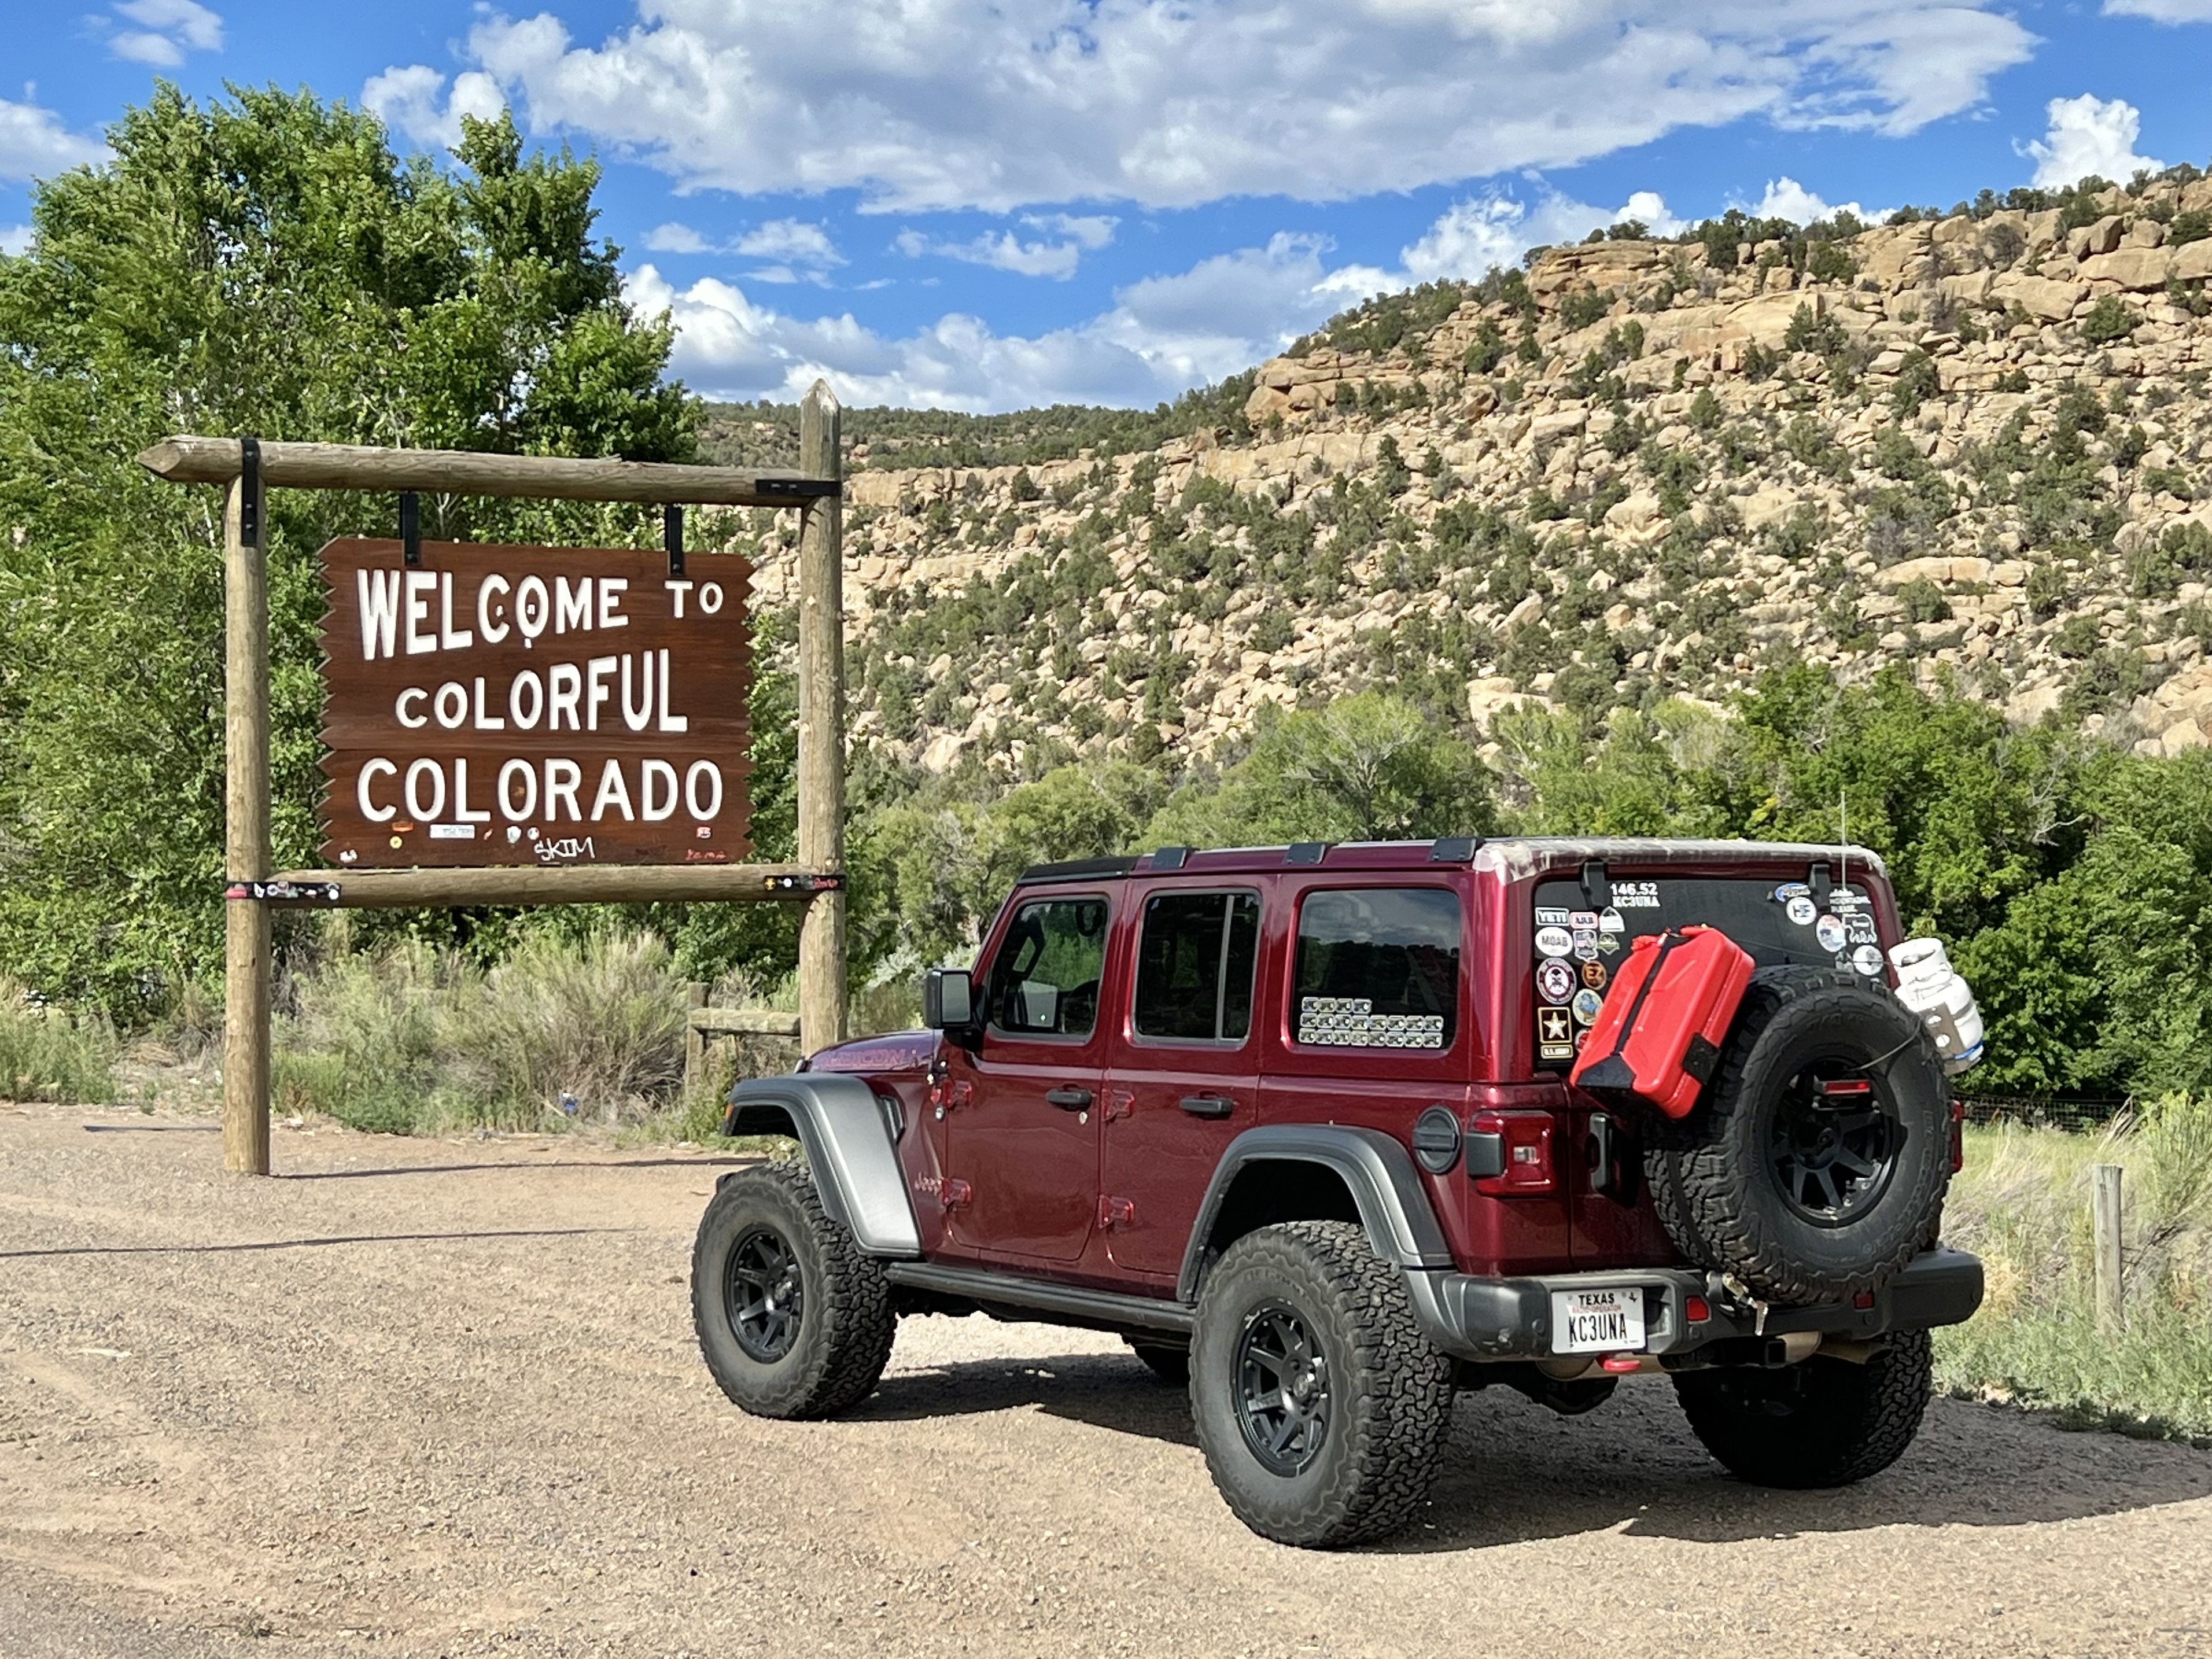
The trip from home to the Ouray KOA was about 925 miles, via US-287 N and I-40 W. Nothing exciting happened, so I did the tourist thing and took pictures of the state crossings.

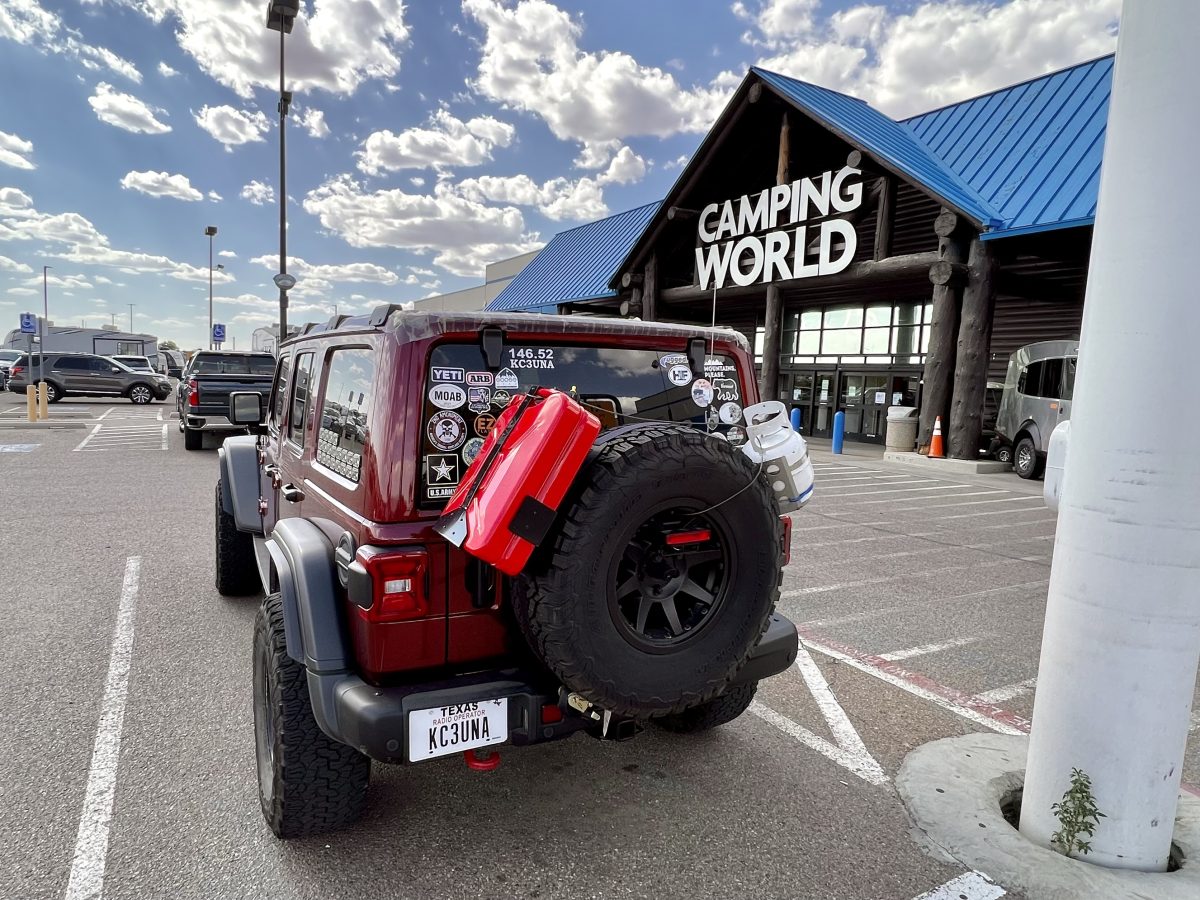
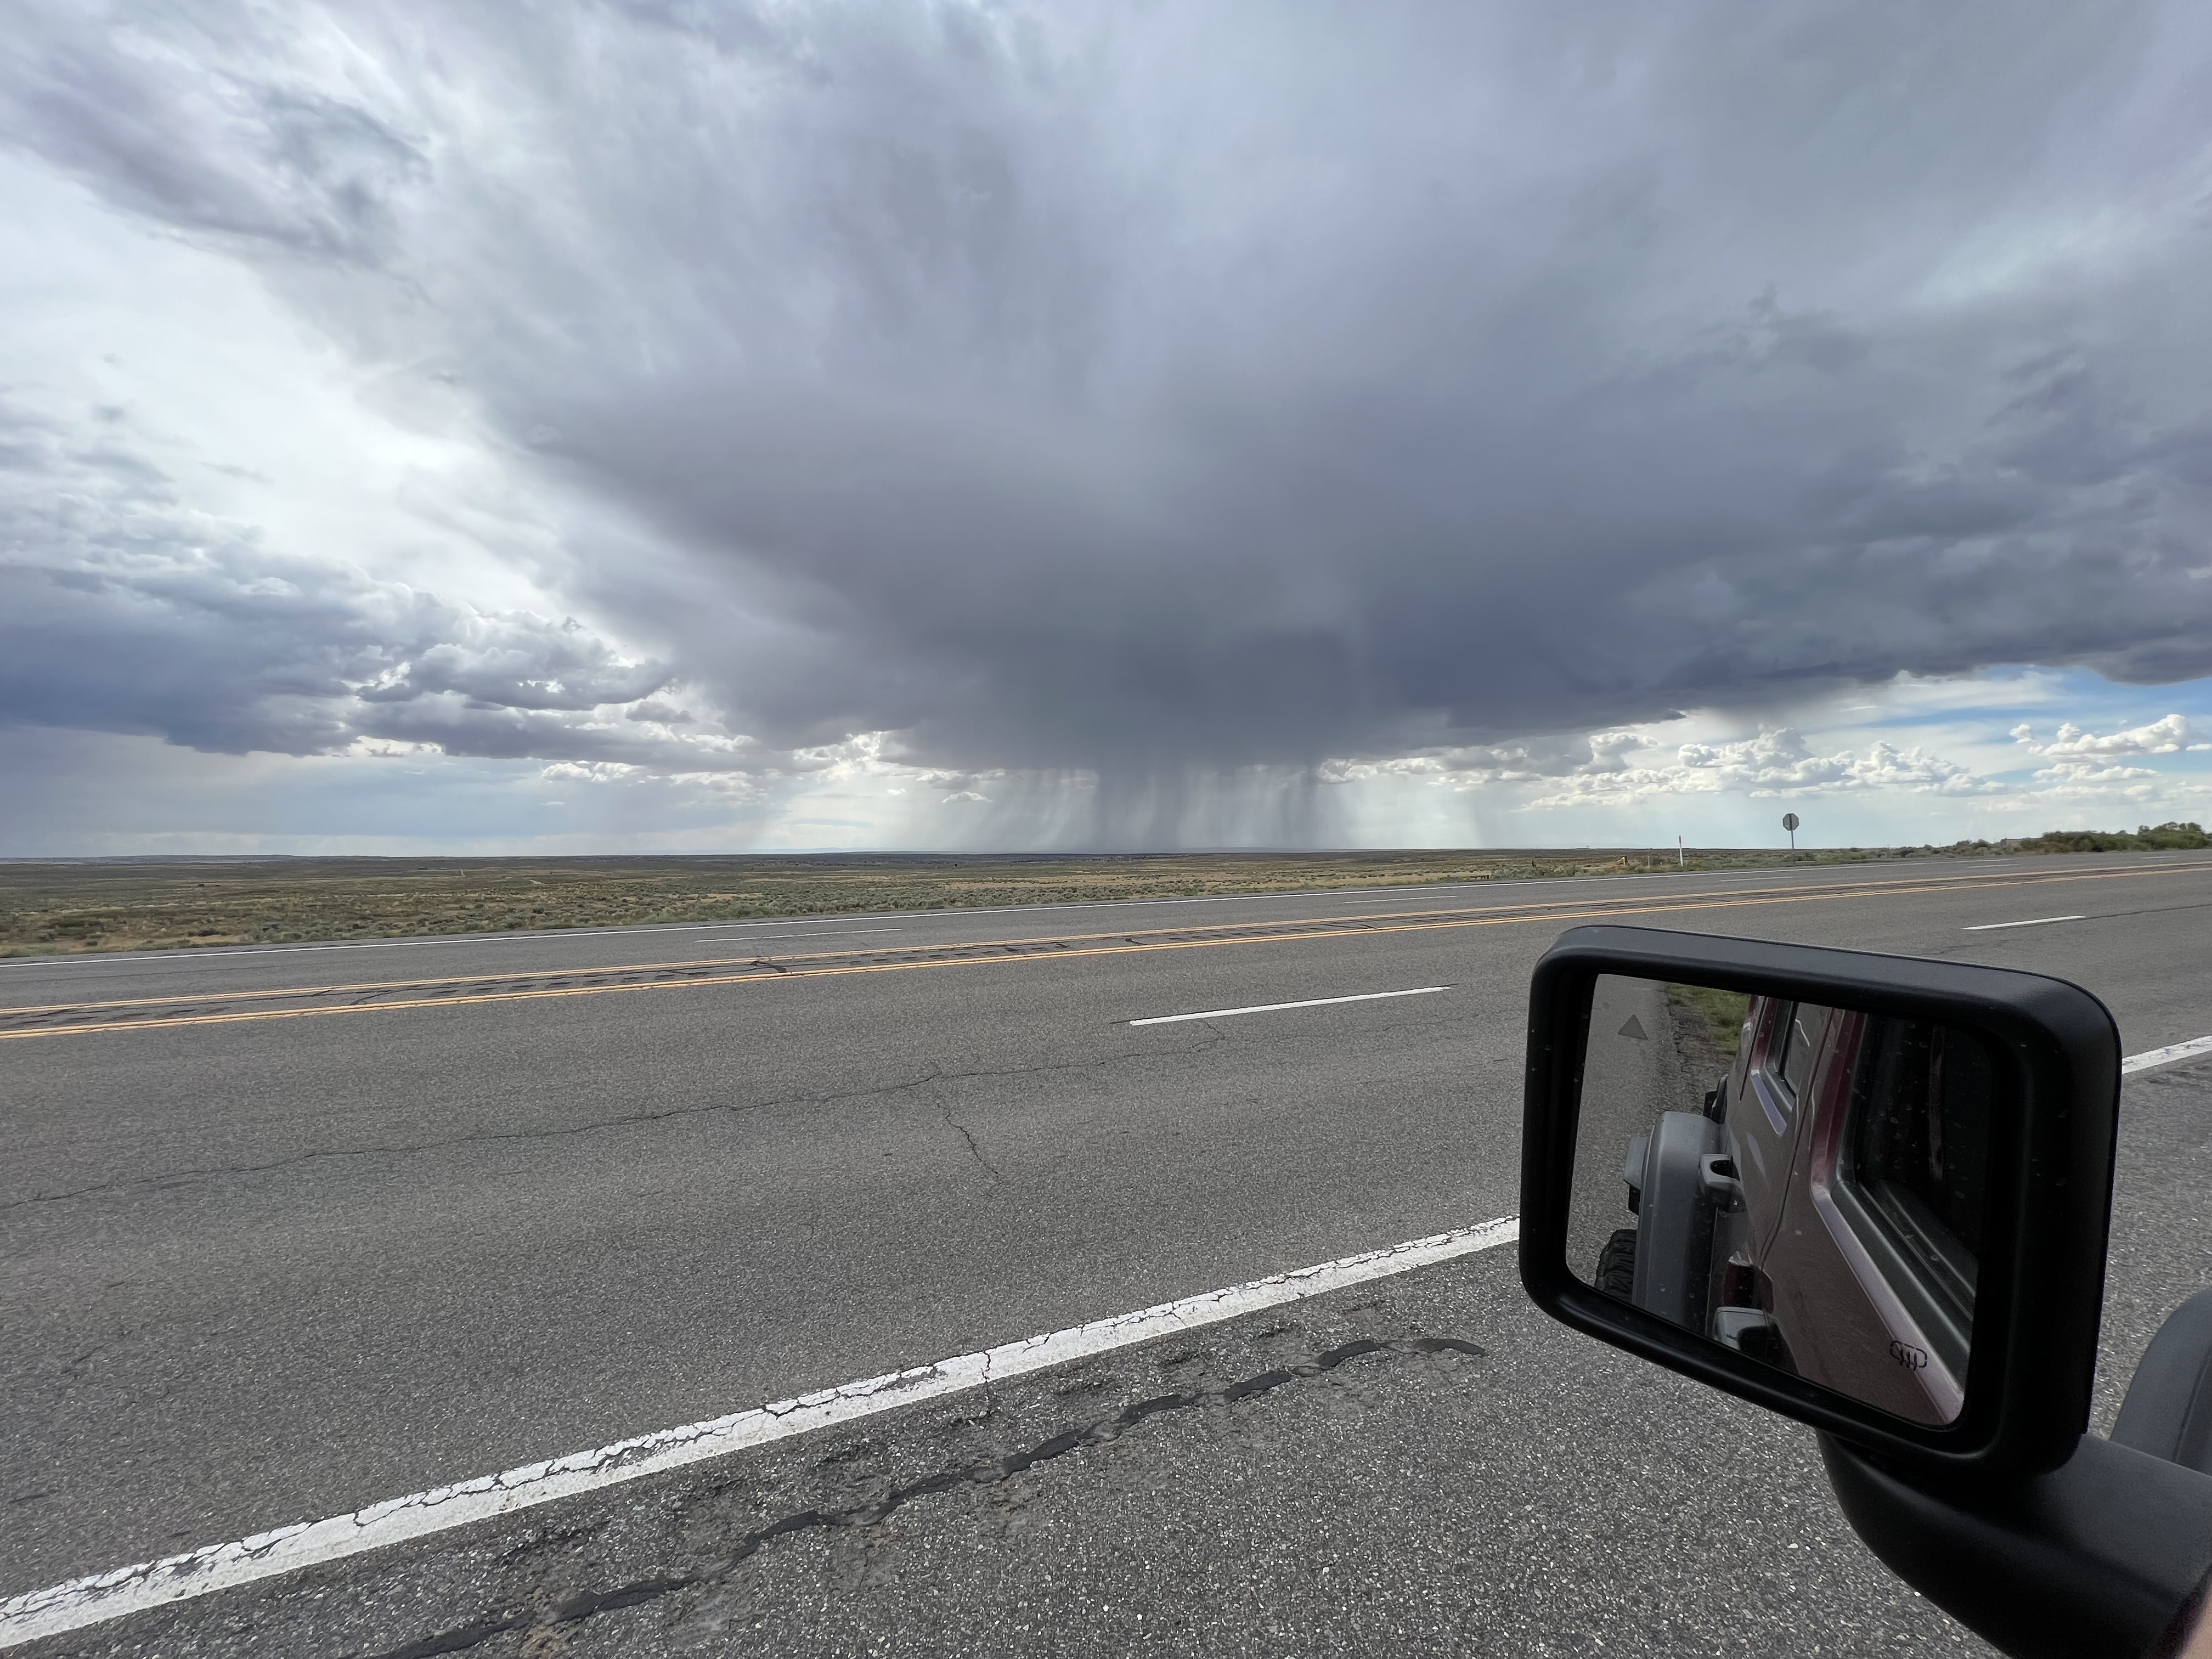
Along the way I stopped at a Camping World to get my 5 gallon propane bottle topped off. There were 8 employees hanging out near the entrance, but the counter person told me they had nobody available to do it. I guess filling a propane bottle requires some sort of certification. I ended up filling it at the KOA. Along the way I saw my first wet microburst. It lasted less than a minute but it was unbelievable.

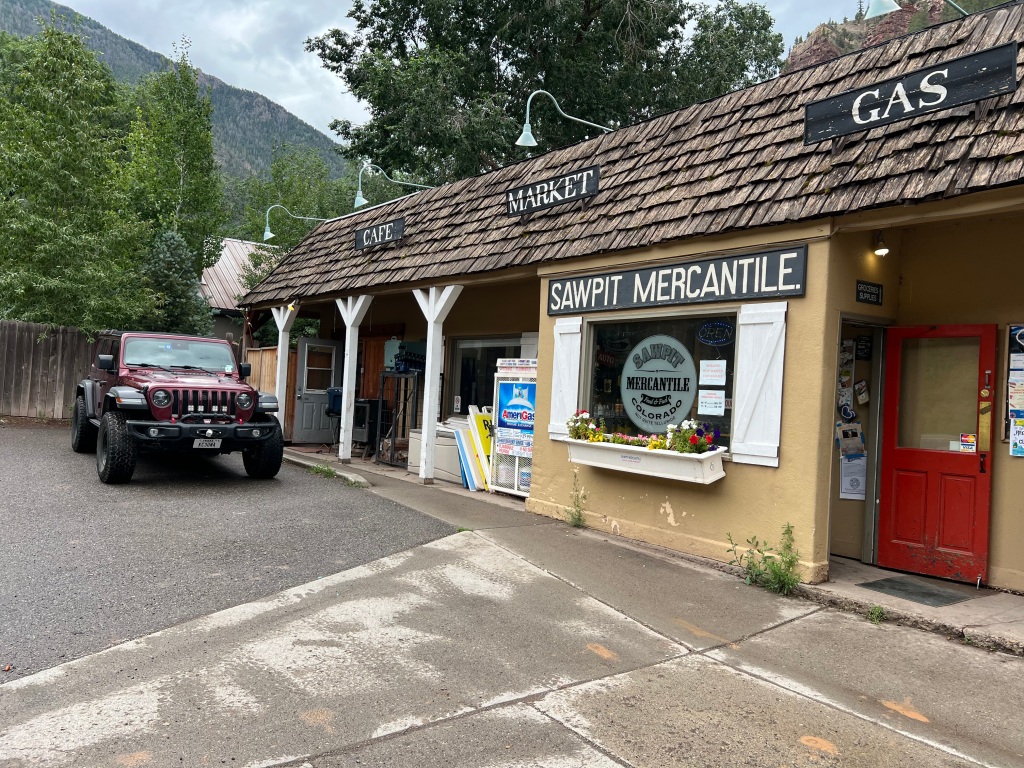
Along the trip I stopped at some landmark “restaurants” that weren’t really restaurants, but due to historic zoning laws, the businesses couldn’t change the signs. Believe it.

A Bugatti Veyron went past me. It wasn’t speeding, but it caught me by surprise. What I didn’t know was that it is owned by Ralph Lauren, and that he has a sprawling property in the area named Double RL Ranch. Most of the locals that I spoke to told me “Ralph has two of those”.

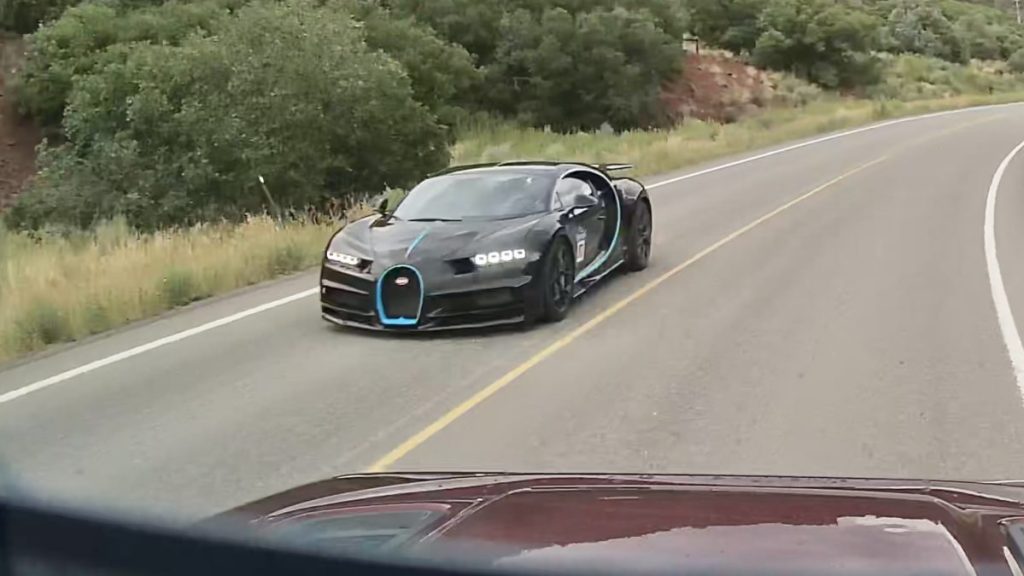
I guess they don’t know about his 1938 Bugatti 57SC Atlantic. Apparently only four were ever made, and only two are known to exist today. The other one does not have matching numbers and was sold at auction for around $30-40 million.

The one Ralph owns does have matching numbers. A prominent classic car expert stated “it would sell for a terrifying $100 million or more”. I doubt Ralph drives that one around.

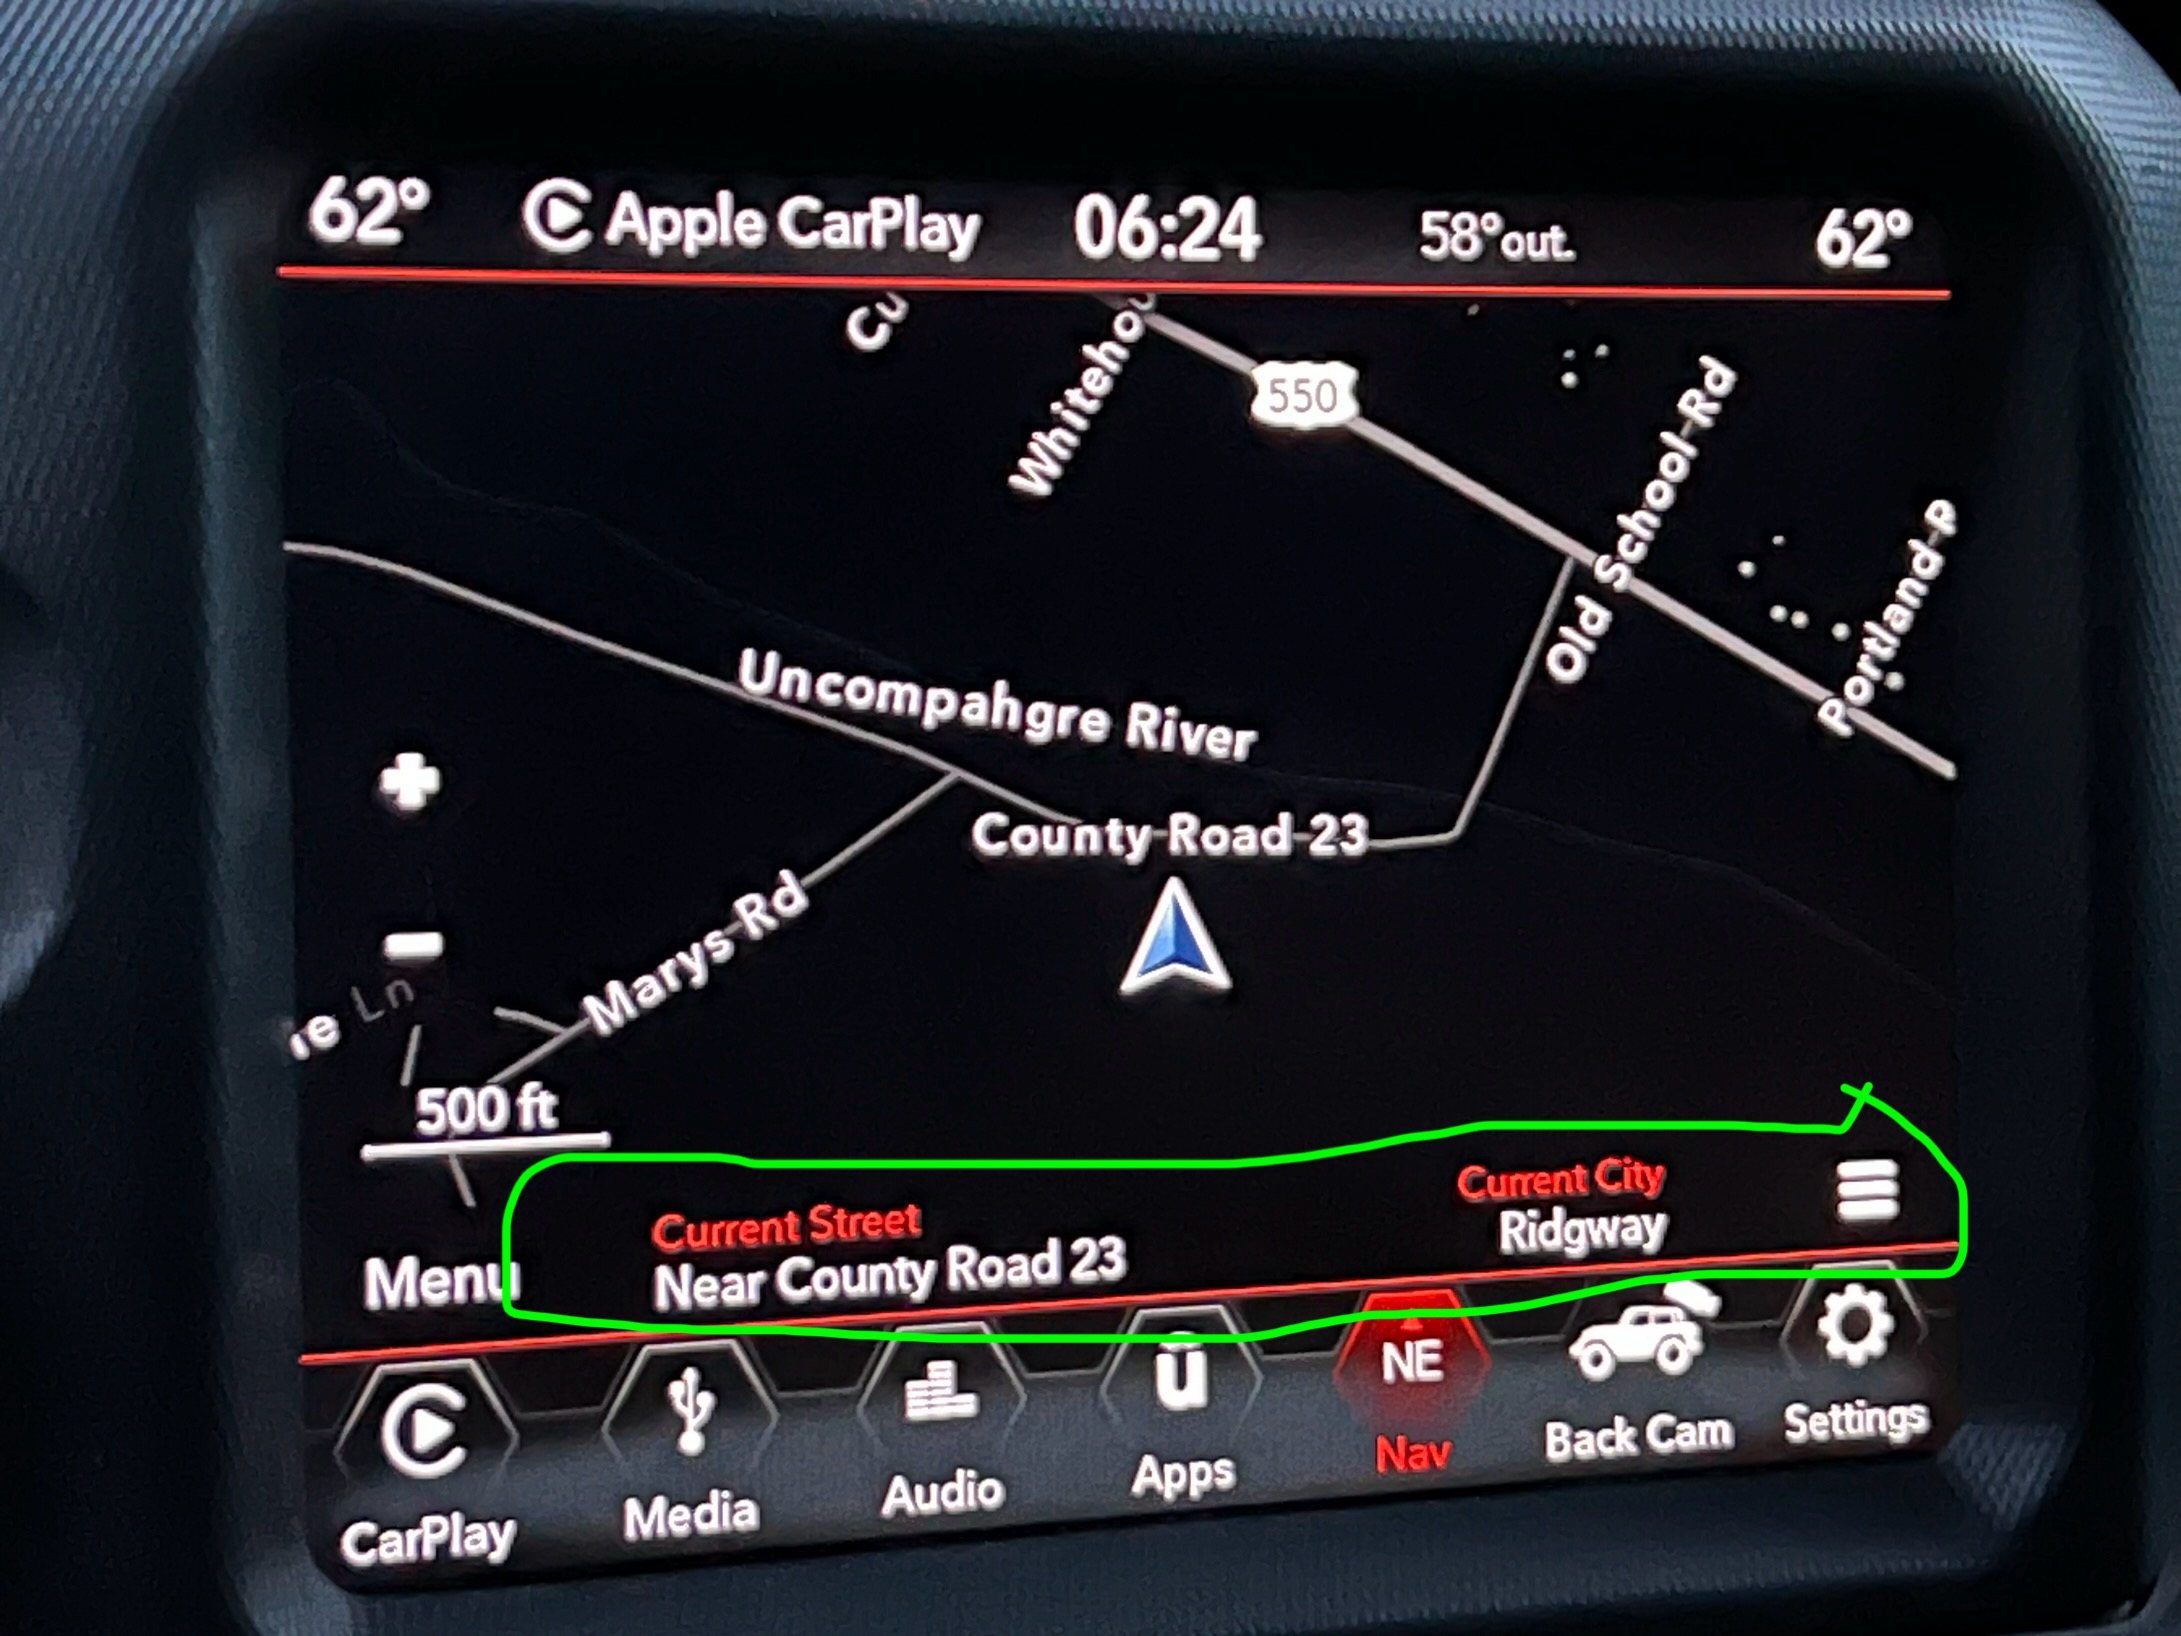
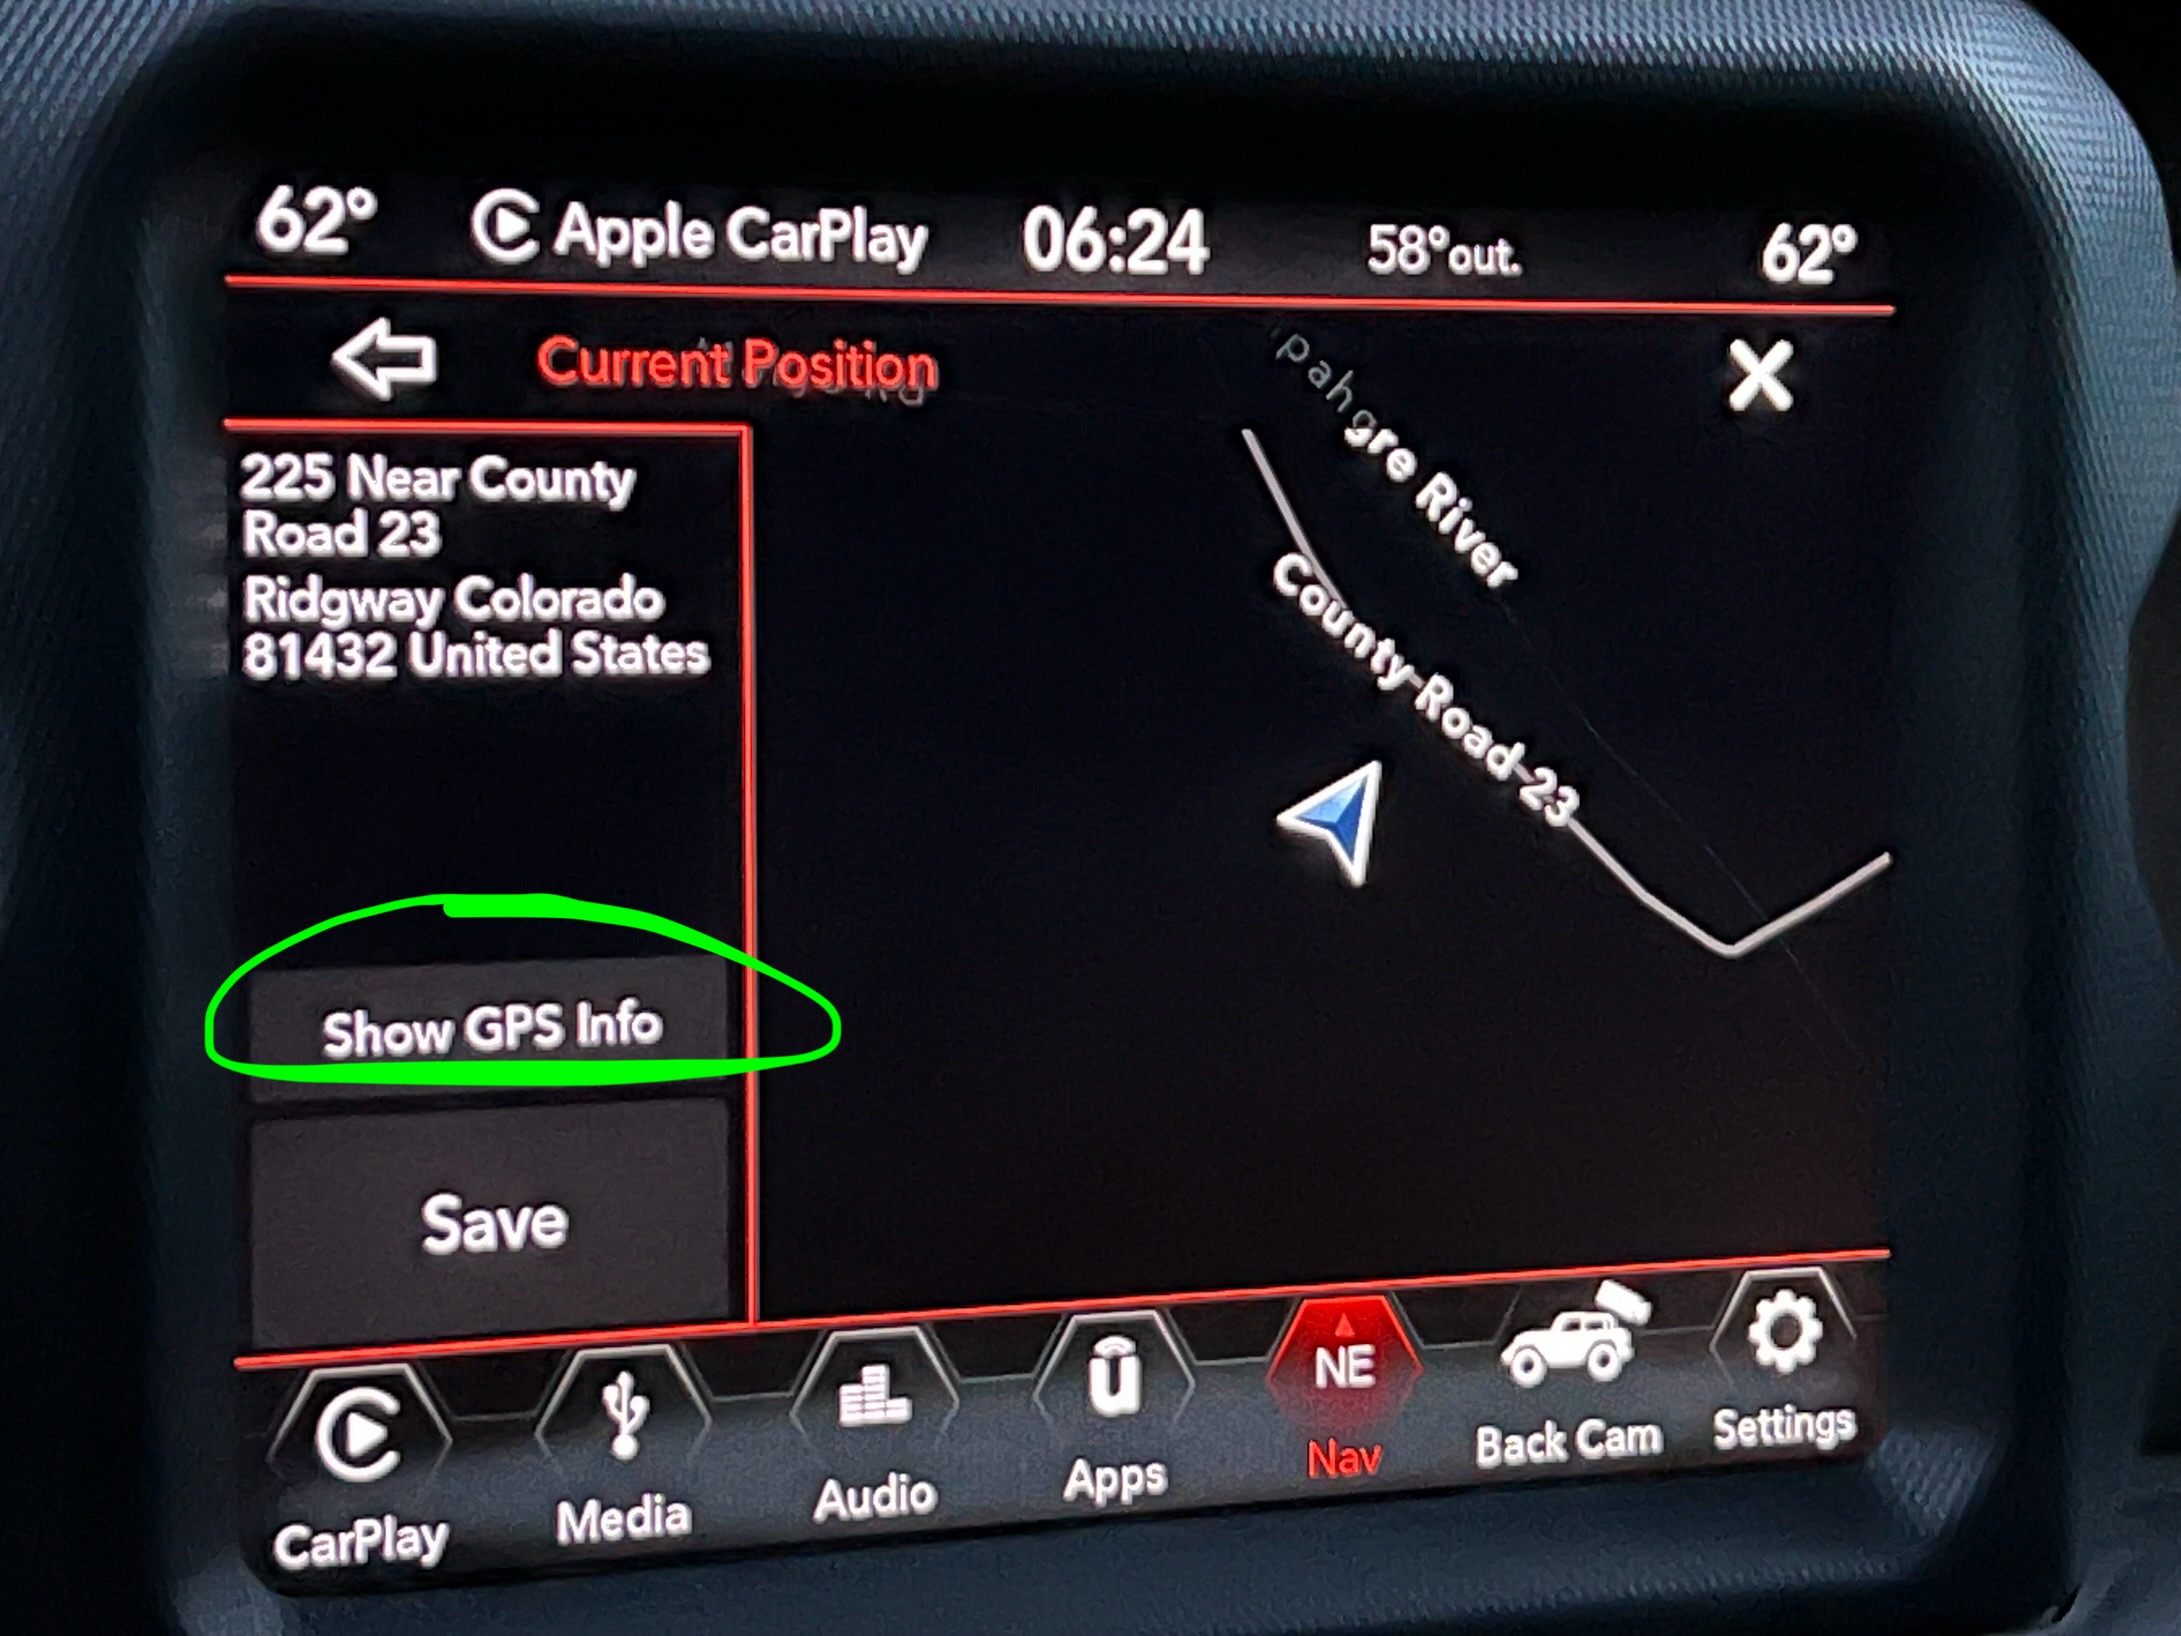
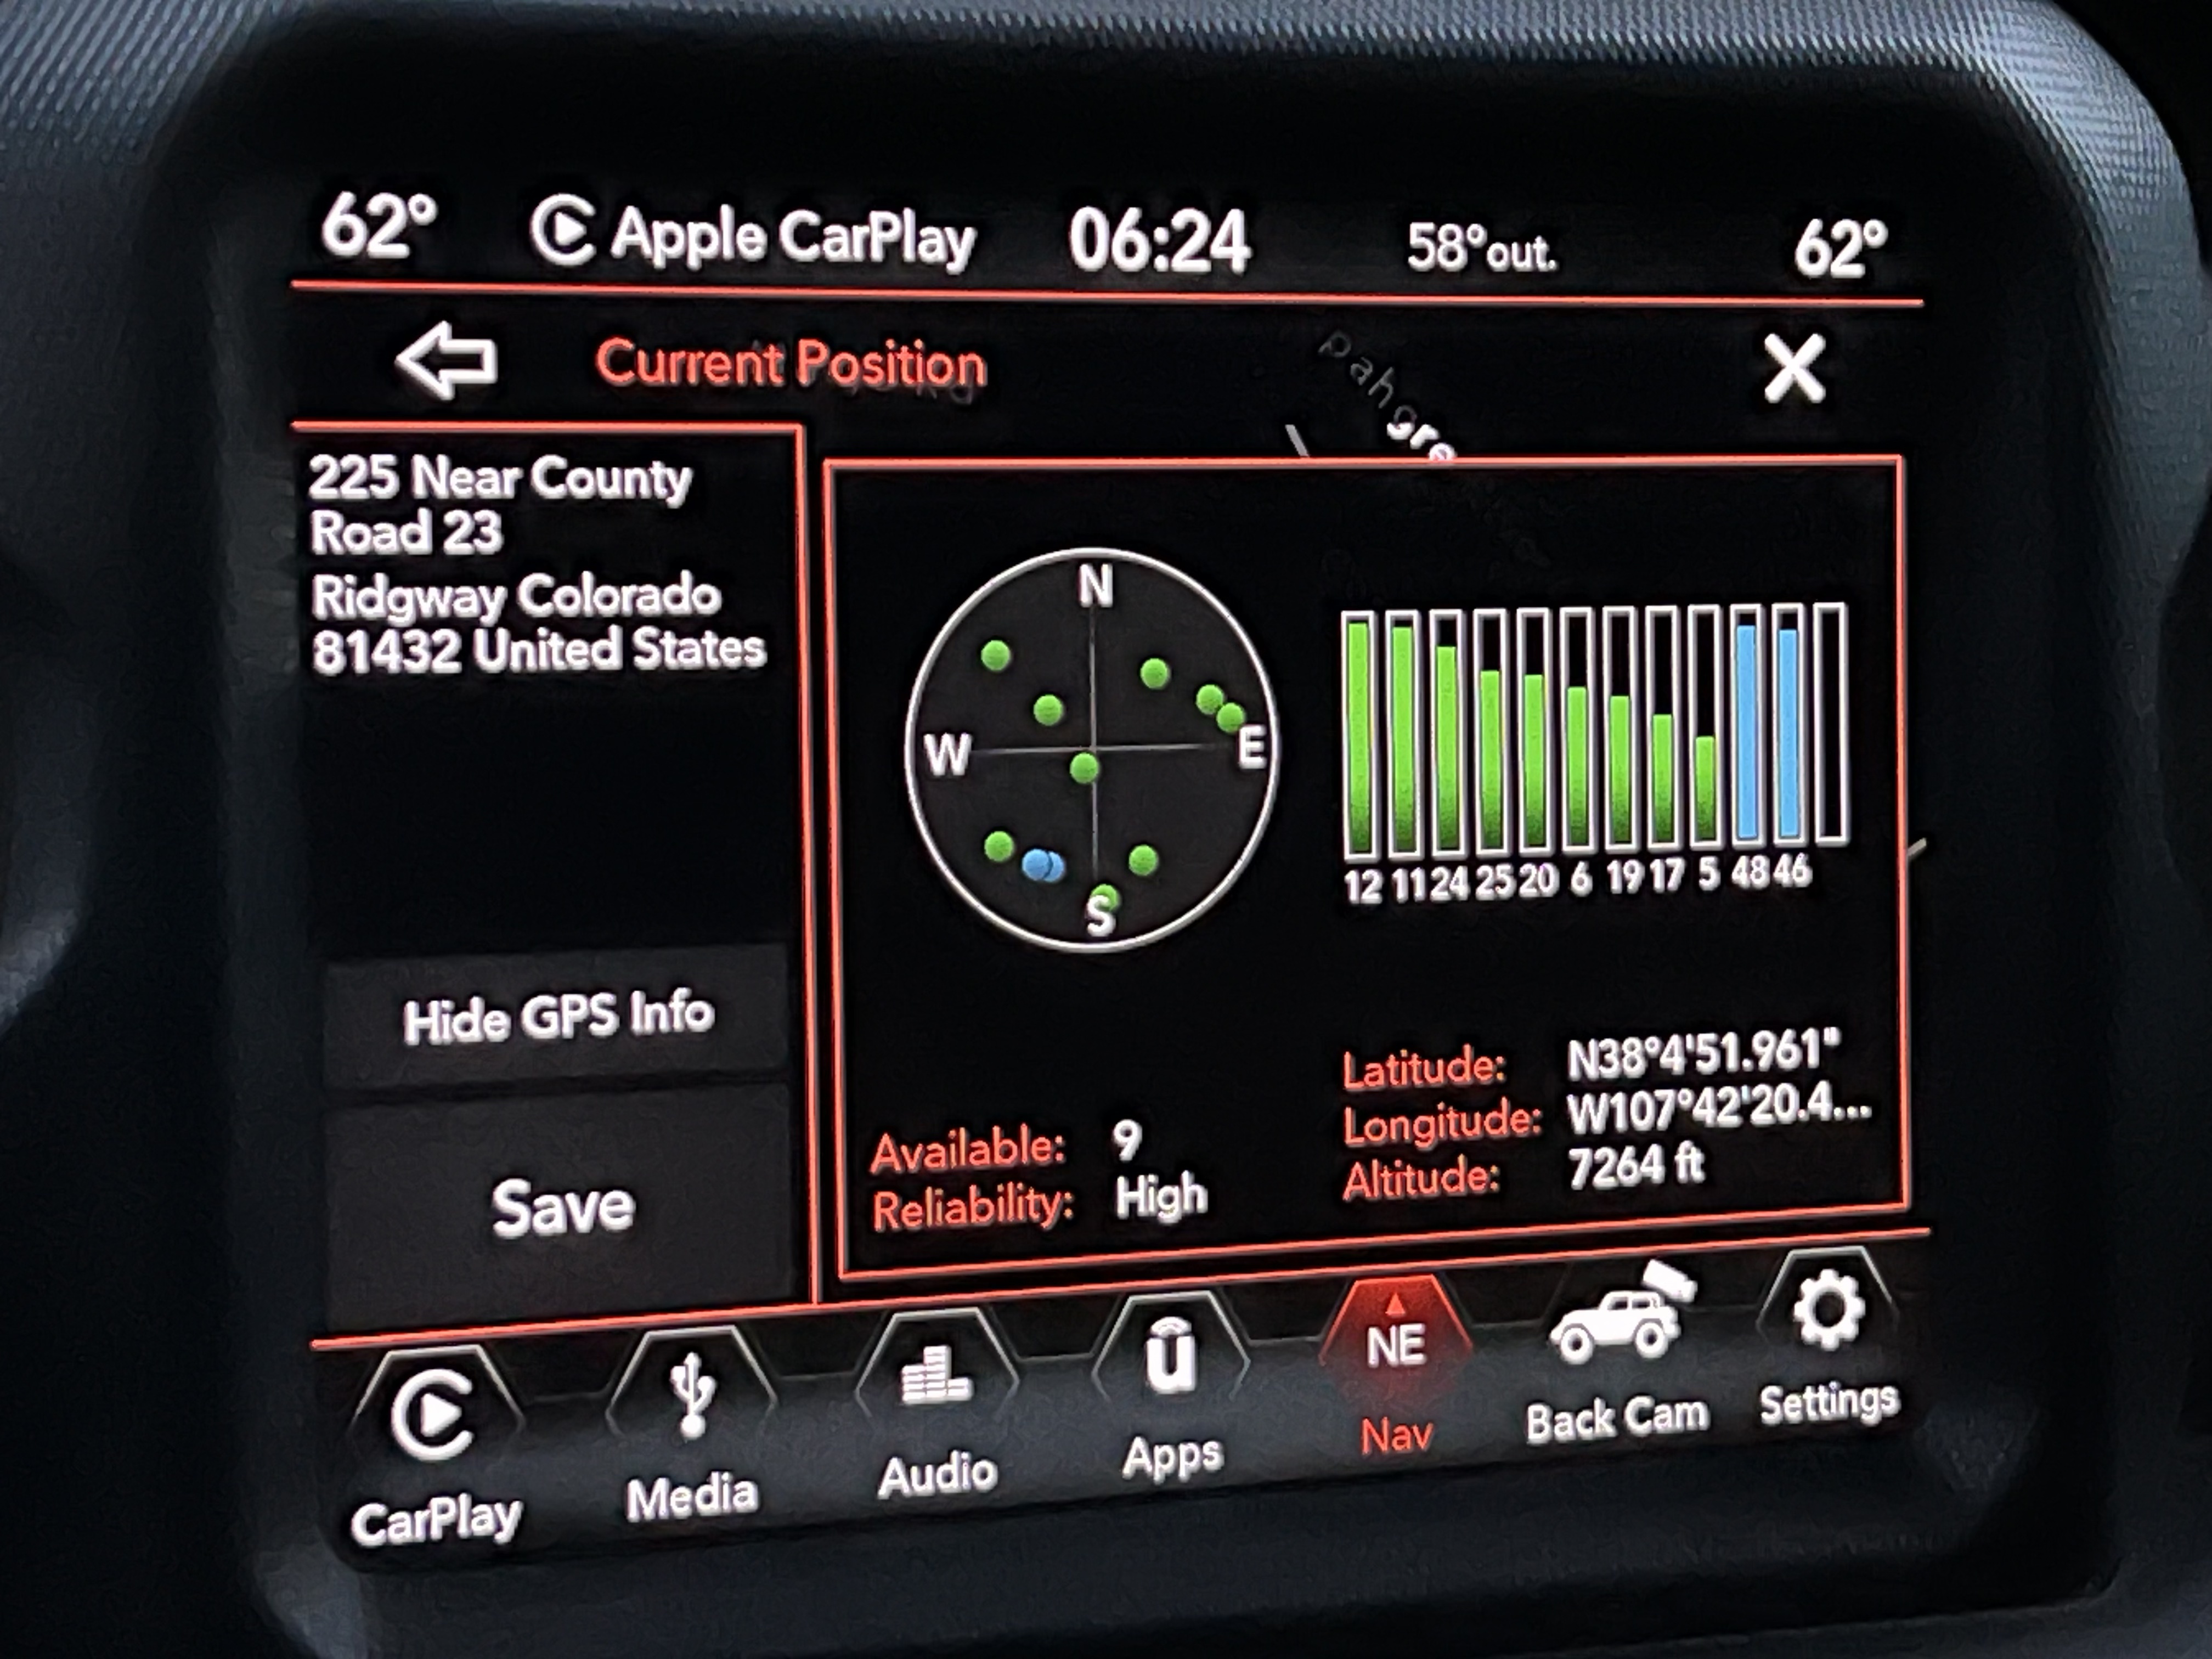
I found a cool feature in the Uconnect navigation unit. As is the case with all devices that have true GPS (not A-GPS that Apple and other companies try to fool their customers into believing is true GPS), it has a GPS summary screen that shows you how many satellites you’re locked into, signal strength for each one, coordinates, and elevation.

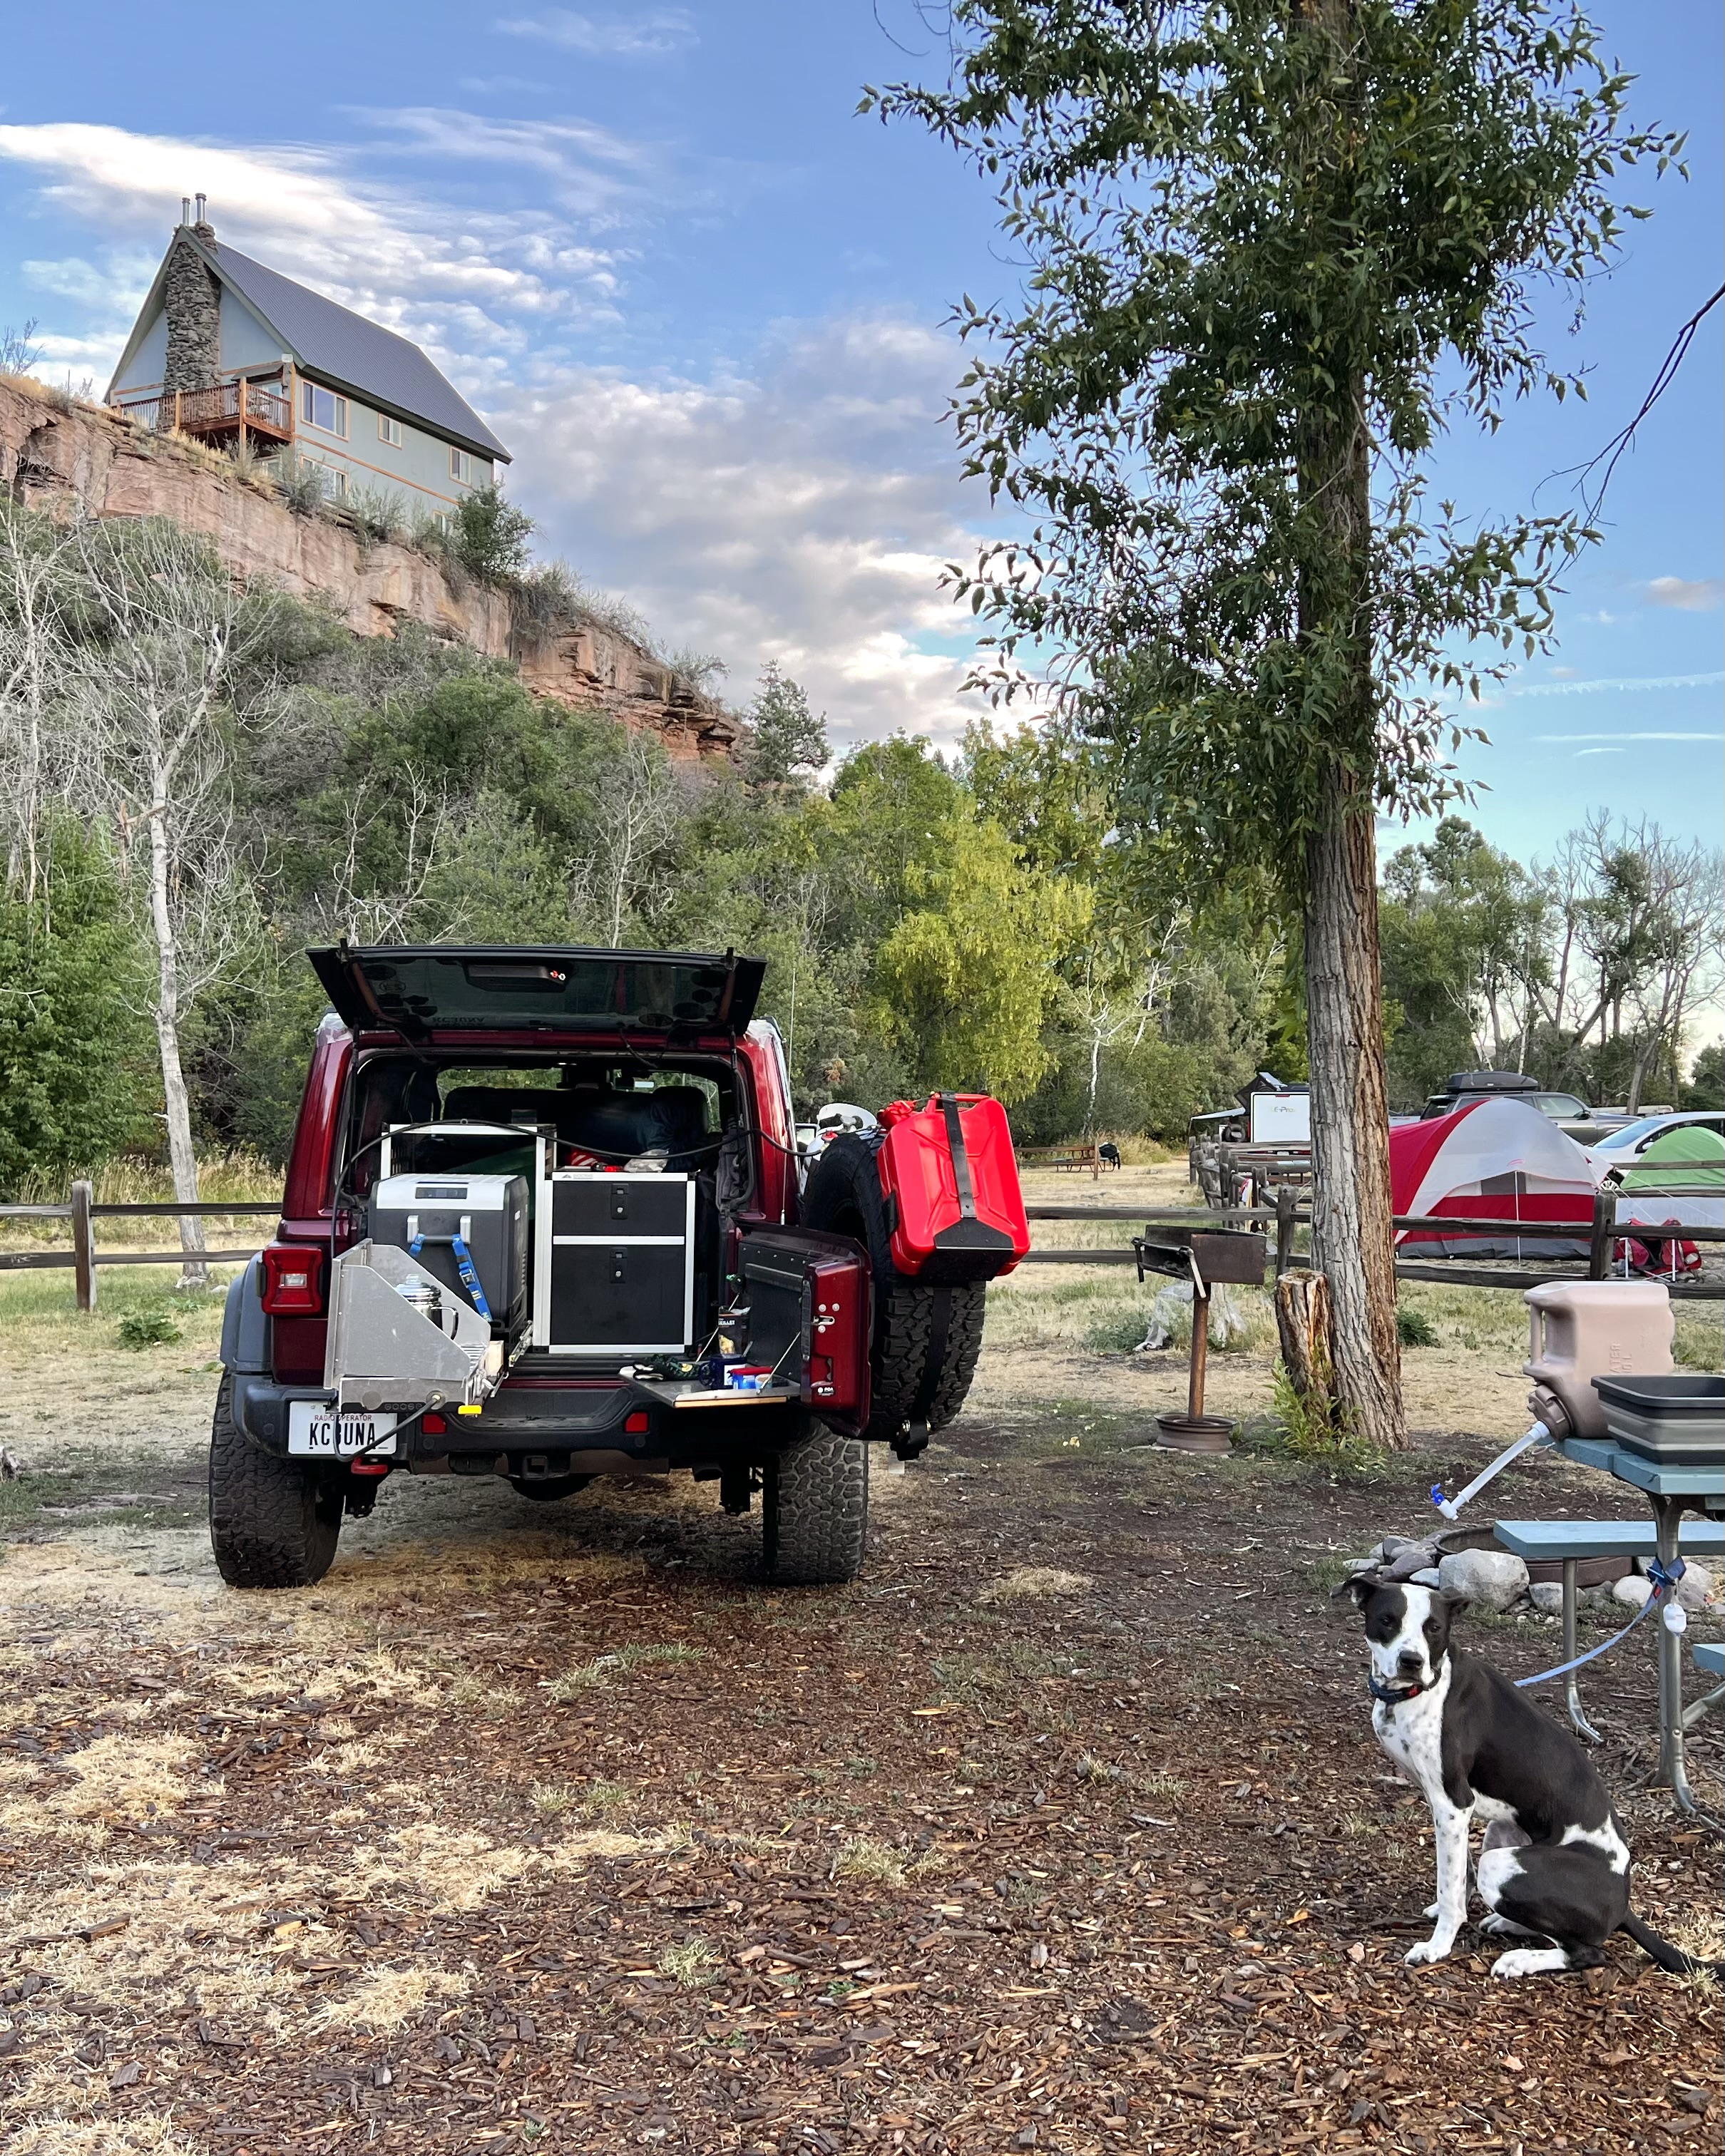
I reserved a primitive camp spot, since I have an off grid power kit and a 2.5 gallon water can in the Jeep. I was expecting a gravel “pad”, but got grass instead. It took 10 minutes to set up the tent. Then I fed Koda, cooked dinner, washed and put away all the kitchen stuff, reorganized the stuff in the Jeep, then I headed to the shower.

I learned that Koda doesn’t like being in my tent. He was happier in the Jeep. Since the temperature was in the 70s, I didn’t have to worry about him being too hot or cold. I got to sleep around 10PM.

I can’t wait to get my iKamper repaired. Once that happens, I’ll just need a hand mounting it before every trip, since it has to be schlepped outside (garage clearance is only 7′). I’ll be fine using my tent for now.

I was hoping to post video or pictures of a (brown) Black Bear we drove past. It was going through someone’s trash cans. I asked Siri to record the precise time, so I can grab the footage. But the BlackVUE dash cam that I have only has the 32 gigabyte MicroSD card, so the clip was overwritten.

I also came close to hitting a deer, but thanks to my Jeep’s heavy duty brakes, I has no problem stopping in time. It went back into the woods. Same issue, the footage was overwritten. I should have pulled over to download the clip, like I did when Ralph went by in his Bugatti. Oh well.

Tomorrow we’ll do Imogene Pass.

Pilgrimage To Black Bear Pass

An important message from the San Miguel County Sheriff Bill Masters: “It is your responsibility to know before venturing into the backcountry, whether hiking a trail, or driving on a pass, if the area is open and can be traveled safely. Black Bear Pass is dangerous, and you need experience and the right vehicle to navigate it safely. Some people have it together and know what they are doing, but some who venture up there are complete ass clowns.

Towing: $10,000. Citation: $1,200. Pucker moment: priceless.

Koda and I have been looking forward to this trip for months. There are four major Colorado mountain passes that I haven’t done yet. The reason, I’ve always went too early in the year. So while I was able to do Engineer Pass and Ophir Pass, the elusive passes (Black Bear Pass, Poughkeepsie Gulch, Holy Cross, and Imogene Pass) have been on my todo list.

Here are links to some YouTube videos…PLEASE like and subscribe all of them!

Black Bear Pass
Poughkeepsie Pass
Holy Cross
Imogene Pass

I just finished packing the Jeep. The fridge is packed with fruits, snacks, juices, and water. I topped off my Scepter 2.5 gallon water can so I’m ready to cook and clean. It’s a six (or seven) day trip, so I have three freeze dried meals per day in my Dometic GO Hard Storage 50L box, along with all my cooking utensils, water kettle, collapsible sink, etc. My Camp Kitchen double drawer unit stores my cast iron pans, dog food, plates, cups, spices, etc. Since this trip is less than a week, I was able to put my bathroom stuff into the box as well.

I upgraded to a Wavian 5 gallon NATO fuel can and my 5 pound propane tank is topped off. Koda’s RuffLand intermediate kennel is strapped down using four FrontRunner Stratchit Shorties and a proper strap down kit (I was using long bungee cords before). My tent, sleeping bag, and pillow provide fill for all the gaps in the back.

I updated my Garmin Overlander, I charged my HAM/GMRS handhelds, my GoPro will get set up before I hit the first mountain pass. My plan is to attach it to the bull bar, with a long USBC cable running into the cab, connected to my 1000w pure sine wave inverter (so it’s constantly powered). With any luck, the GoPro settings will prevent it from sleeping. FWIW GoPro is an overrated toy that is a terrible camera for wheeling/overlanding (will be replacing it soon).

The dealer topped off all my fluids, and gave the Jeep a clean bill of health. I haven’t installed an oil pan and transmission pan skid plate yet. I might regret that. 🙂

Ok, Koda and I are going to sleep. Tomorrow’s drive will be a little under 500 miles.

Home Depot For Screws

All I wanted was to mount my new license plates. I was rolling with temporary paper tags. Jeep’s steel rear bumper uses a plastic mounting bracket. Mine was broken, so I bought a replacement, but I couldn’t find install instructions. I searched all the Jeep forums and couldn’t find answers. Someone posted a picture of the steel bumper without the plastic mounting plate, so I had a hint. I decided to wait for my new Texas plates to come in.

The new plates finally arrived. It took a while since I requested HAM radio operator call sign plates. This way any other radio operator can contact me on or off road. So here I am at Home Depot. I came here to pick up a four pack of 1/4” x 3/4” machine screws. I was excited, finally ready to scratch another task off my todo list. But something unexpected happened.

My Jeep somehow got surrounded by 1/4 million dollars worth of awesome off-road vehicles! A black G-Wagons that is seriously modified for over-landing. A white G-Wagon that didn’t look too modified. And a shark colored Porsche Macan. Ok to be fair the black G-Wagon was the real deal, and the other two were probably mall crawlers. There was also a forest green Toyota Tacoma TDR Pro that had some nice mods.

I walked around taking pictures, hoping I wouldn’t annoy any of the owners. I took a couple dozen photos before my iPhone overheated and shut down. Having lived in Coppell, TX a dozen years ago, I’m not surprised at the three week (so far!) string of 100+ degree weather. I got into my Jeep, gave my iPhone a while to cool off, then I was able to take a few more.

The Vehicle owners haven’t come out yet, so I went ahead with my original plan and swapped out the license plate mounting bracket. As it turned out, I was overthinking the replacement process. I yanked out the mounting bracket, pulling the left side first and then the right side by the light. It came off easily. The light cable is a weather proof quick disconnect so it was easy to get it all off.

I had the new plate already mounted on the new plastic mounting bracket. All I had to do was disconnect and remove the light from the old plastic mounting bracket and attach it to the new mounting bracket. Then connect the cable to the new plastic mounting bracket and push the mounting plate into the steel bumper. Lots of alignment clips to ensure the new plastic mounting bracket goes into the right position. I added a couple pieces of 3M double sided tape under the bottom of the license plate to prevent any rattling. I might circle back and drill a couple holes to add two more screws.

I mounted the front plate to the winch fairlead bracket that is at an odd 45 degree angle. I don’t like the front license plate location, but it’s where Jeep wants you to mount it if you have a winch. I think it’s stupid for two reasons. First, how the heck can the police read the front plate, not to mention rocks will turn it into it a mangled pseudo skid plate in no time.

I found a few winch fairlead bracket flip up license plate holders on Amazon. I’ll order one to see if that does the trick. I’ll check the forums first to see if anyone has any recommendations. I wish more brick and mortar stores with stock would exist. Meh, someone of course needs to own a $500M yacht, a barbie wife, and rocket ships to pretend to be an astronaut. That all costs money, so screw brick and mortar stores, right?

So the black G-Wagon owner came out and was cool when I asked some questions. It had two high but rear facing snorkels. He told me they’re made by a third party. I never saw a dual snorkel. I have a snorkel on my todo list because on several long desert terrain trips, I really could have used cooler air coming into the engine. I’m not one to exceed Jeep’s 32” fording depth limit, so I’m not doing it for water. Though rear facing snorkels are not terribly bad, I’m not keen on 70mph droplets being force fed into my cold air intake. I originally wanted a dome shaped snorkel, but now I’m rethinking things.

I asked about the patches on the rear window. As it turned out, they’re Toyota CJ patches, if I remember correctly. Like Jeep’s BOH. He confirmed he does serious trips. That’s refreshing, given the number of posers out there. I didn’t ask about the other mods, since every off-roader has different needs and goals. Who knows, maybe I’ll see that G-Wagon again on a trail somewhere.

BesTop Sunrider FTW

I’ve had the BesTop Sunrider on my todo list for a couple years. It only became a priority after taking my new Catahoula rescue dog Koda to Easter Jeep Safari 2023 in April. The weather was incredible. There were days when I wanted to take my Freedom Panels off, but with my Camp Kitchen and Koda’s kennel, there wasn’t enough room to stow them. I mean there was horizontal space, but they really need to be stored vertically. While I could have left the Freedom Panels in the cabin on the morning of each ride, the weather was too unpredictable.

EDIT: a few days after I posted this blog, Lite Brite posted an install video!!!

My favorite store 4 Wheel Parts store in Frisco, TX had one in stock. After confirming it has the twill cloth, I paid for it over the phone, with veteran discount, and picked it up. We had to take it out of the box to fit it into the Jeep. When I got home I took off the Freedom Panels and left them in the kitchen. The instructions say all you need is your Jeep toolkit (for the Torx 40 bolts) and an inch pound torque wrench (which I’ve had but hardly ever used). From online videos, most recommend some vinyl tape to hold the wire ends in place.

I found a shady spot for the install. It was a very easy install, except for the tiny nut/bolt and wire connectors that replace the “Z” ends of the tension cables. The holes the the attachments go through are behind raised ridges which made it a challenge to insert, connect the wire end and screw the nut/bolt together to secure. I plan to contact BesTop so they can update their instructions. I still completed the install in less than an hour.

The quality, design, strength, and appearance is incredible. Opening it is quick and easy, and closing it is just as easy. The engineers were able to mimic the contour of the Freedom Panels. So it is hard to tell from more than a few feet away that it isn’t the stock Freedom Panels. A sharp eye will see the twill fabric and know it’s the BesTop Sunrider.

I took it out for a spin and I had a big smile on my face. I shouldn’t have waited so long. But. Priorities. I drove on the highway and confirmed that the noise level (when closed) is about the same as the Freedom Panels. Opened, of course there is wind noise. But that happens with all convertible tops. The twill material is supposed to withstand golf ball size hail. Hopefully I won’t have to test it. 🙂 Good thing I paid the $99 extra for damage replacement. The water seal will be tested once it rains, or maybe I’ll take it through the touch-less car wash. #cringes

Hidden Falls Adventure Park, Texas

After a couple exhausting days at Eagle Pass, TX (due to heat!), Koda and I headed towards Hidden Falls Adventure Park, located in Marble Falls, TX. I’ve been to Black Gap 4×4 Trail at Big Bend National Park, and Northwest OHV Park at Bridgewater. Now that I’ve been to Hidden Falls I can say the other trails can learn from this place. 🙂

I didn’t expect to stay there long, but the quality of the park and trails was pretty amazing, so I decided to do the long green loops. They have multiple camping areas, a general store, lots of outhouses and picnic areas, and so many signs that there’s no chance someone with no sense of direction (like me!) could get lost!

Maprika has what might be the most detailed and clear map ever. You couldn’t get lost if you tried! Heck, even Google Maps had most of the trails labeled! My Jeep’s Uconnect was spot in as well.

Most of the pictures I tool were of the signs. Detailed, and some were humorous. 🙂

Eagle Pass and Window Tint

Big Bend’s off road trails are closed until further notice. So I decided to take a few days off and visit some Florida Highway Patrol buddies helping our border agents at Eagle Pass, TX. On the way back I plan to visit Hidden Falls Adventure Park, which is only open Thu-Sun. That ought’a hold me until my Colorado trip in Aug. 🙂

To prep for this trip, I had my front door windows tinted. This was on my todo list for months but it didn’t get hot enough to get it done. Well, the weather stations are predicting 100° temperatures for the next couple weeks. So I started to ask around for some recommendations.

The consensus was to have Custom Car Stereo and Tint in Carrollton, TX do the work. Nothing beats all your buddies recommending the same place! So I had them install 15% tint on my front door windows. They did an awesome job. Very precise, clean work. I can recommend them without hesitation. I’m all set for the Summer!

Custom Car Stereo and Tint, Carrollton, TX.

I stayed a couple nights at Motel 6 in Eagle Pass. Couldn’t get close enough to the river to get pictures. Security is very tight around here. I’m probably in the safest hotel in town, because of the dozens of Florida Highway Patrol cars parked at the hotel. Gotta love it when selfless caring officers go above and beyond to provide safety and security. Thanks to Governor Abbott for helping to preserve law and order at the border.

I thought about crossing the southern border long enough to take a photo of Koda and the Jeep at the huge Mexico flag. The agents told me I just need a valid US Drivers License. But then they told me it is illegal to carry a weapon into Mexico. There was no place to secure it for my 10 minute Mexico excursion. Oh well, maybe next time. I do have Baja, Mexico on my 2024/2025 wish list.

I’m staying at the La Quinta at Marble Falls for the night. Hoping to join some Jeeps at Hidden Falls Adventure Park tomorrow. Strange storms with black skies and horizontal lightning in the area, so it’ll be muddy for sure!

HAM, GMRS, and CB relocation

UPDATE: Adding a Cobra 75 All Road AM/FM CB radio to the mix. I’m updating the pictures on this blob post and republishing it. The CB body is mounted to the front end of my Goose Gear full platform. The Bluetooth mic is kept in the glovebox.

Once I had my HAM and GMRS faceplates mounted securely to a Lido LM-L-MAX seat rail bracket bolted onto the front left passenger seat bolt, and my CB Bluetooth mic in the glovebox, the next task on my list was to put the three radio bodies in a secure and hidden location. At first I thought about mounting them inside the Goose Gear platform cubby hole behind the driver’s seat, I decided against it since I want my recovery gear in the closest cubby hole.

I decided to route power for all three of my radios to my LiFePO4 off grid battery. This made the wiring so much easier. It also helps preserve my the Jeep battery charge. I have my ARB Dual onboard compressor (CKMA12) mounted under the passenger seat, so I had to come up with a mounting platform so I could put the three radio bodies under the driver’s seat. I didn’t realize there was so much room under there. I decided to mount the HAM and GMRS radios on a piece of 3/8″ finished plywood, secured to a 2″ x 1/8″ aluminum strip, attached to the two rear driver seat rail bolts.

OmniGraffle diagram. Grey is the aluminum bar, black is the seat rails.

There was plenty of room to mount the radio bodies side by side, fans facing forward. This provided the best ventilation, and allowed plenty of room for cable management. There’s even enough room to insert/eject the microSD card used to back up and program the HAM radio.

Luckily I had a jigsaw with blades for all types of metals and wood. So cutting the plywood and aluminum bar was easy peasy. I used a Dremel to finish the cut sides to prevent sharp edges on the aluminum bar, and splinters on the plywood. I had plenty of stainless steel bolts of all sizes, and nylock bolts, and washers.

Once I had the 1/2″ holes drilled on the ends of the aluminum bar, and the two 3/8″ holes in the center of the wood piece, it was easy to put it all together. Mounting the radio brackets and the radios onto the brackets was a bit of a challenge (think race condition).

Once the new platform was all assembled, I used four M10-1.50 hardened steel bolts to reattach the seat rails to the floor of the Jeep. I placed the kit with the aluminum holes over the seat rail holes, and I put the seat rails over the aluminum bar holes. They aligned perfectly, so I put the bolts in but kept them loose until the end.

I put the two front driver seat rail bolts in and tightened them down, then circled back to tighten down the rear bolts. I was expecting a wrestling match with some contortionism, but I was happy that things just fell into place. I slid the driver seat back and forth, plenty of room over the radios.

After finishing the wiring, I was very surprised how easy it was to do. It’s true that Goose Gear platform is the overlander’s dream come true.

Northwest OHV Park, Texas

Nice place though IMO there aren’t enough trail markings to follow the trails without accidentally finding yourself going from a green (easiest) to a red (hardest) trail. So some of us found ourselves doing u-turns on narrow trails. Not a big deal though. Glad it’s only 55 miles from home.

It was hot and humid. I had the AC on and was having a lot of fun so I didn’t take many pictures or videos. Lots of mud holes to splash through and some decent inclines and declines on the green trails.

Koda enjoyed bouncing around his strapped down (very safe and secure) Ruffland kennel, looking forward to the day he can sit in the front passenger seat.

Glad I didn’t forgot to check in for the BOH. I hope to come back with a group next time.

It’s amazing what three minutes with a pressure hose can do. The touch-less car wash is closed today, so I plan to go there in the morning to give it a proper bath.

EJS Day 9 – Seven Mile Rim

My apologies, I had the Relive app on Pause for most of the end of the ride, so that explains the long straight line.

I picked this trail for the final EJS day since it’s rated 4. I think the rating was spot on, even though there were three spots that some folks asked for a spot. They all had bypasses, but they weren’t so tough.

We started at 0900 when it was cloudy, and we finished around 1500 when the sky was mostly clear. We were told the ride would be longer ride than usual so we were prepared with plenty of food and water. We stopped once every hour or so for a 10-100 (#1) break. Koda was happy to mingle with the other dogs, kids, and adults, on every stop. His tail was wagging like crazy. I can tell he is an off-roading dream dog. Folks liked him in return.

Lots of beautiful scenery, a fair amount of gravel and sand roads, sprinkled with some pretty challenging slick rock spots. The lead did a really good job of describing the landscape, the trees, the arches, and the uranium mining history. The gunners did a great job in keeping the group together. We got advanced notice of all the tough spots, and which way to bypass them.

I’m a little sad that today is the last EJS day, but it’s the best one I’ve been to yet. I’ll be back next year. I’m starting to plan my late Summer trip to the Colorado Rockies. The past two times I went right after EJS, but the best trails were closed due to snow. I hope to finally do Black Bear Pass, Imogene Pass, and Poughkeepsie Pass. I’ve already done Engineer Pass and Ophir Pass.

I washed the Jeep after the ride. Tonight’s chores include packing the Jeep, doing laundry, and going to sleep early. The next two days will be 500 miles each. I hope to get to Santa Rosa, NM tomorrow before the sun goes down, and the same for the following day’s trip to Plano, TX.

Here is one of the three spots that folks wanted to get spotted on.

EJS Day 8 – Top Of The World

One of the most most iconic trails in Moab, with a 1,500 foot high ledge that people from around the world come to for a classic picture. Jeep rates this trail 6-8 of 10. 32” tires are recommended but lockers and a winch are not required.

I’ve done this trail before. I can’t imagine doing it with less than 35” tires and a 2” lift. There are lots of challenging spots, and several spots where you would bottom out if you didn’t pick the perfect line.

The money shot. I wonder if Koda knew we were on a 1,500 foot high ledge?

When we stopped for lunch my Jeep was on an weird incline that prevented me from accessing the back of the Jeep to get to my lunch. A tailgate with a 35” mounted tire is too heavy to stay open at that angle. I radioed the Gunner and he quickly got the owner to move it so I could level out. That was a fun reminder to park level at lunch stops.

It was an eight hour day, but Koda loved it. He got to mingle with the other dogs and the folks on the ride. We had excellent gunners, great spotting, beautiful views. It was a fun day!

EJS Day 7 – EZ-Flate FTW

I was supposed to do Fins and Things (again) today, but I felt like sleeping in, so today turned out to be a rest day. I ended up going to the Old Spanish Trail Arena to check out the vendor booths. I had one item on my shopping list.

Since EJS 2021, I’ve been using a MORRFlate Quad tire hose kit to air up my Jeep tires after a trail ride. If someone is inflating all four tires with a kit that has neon green hoses, it’s likely a MORRFlate kit. The product has been durable and reliable, but over time a few annoyances started to set in.

This year I noticed a number of people using an EZ-Flate HyperFlex, which uses orange hoses. Talking to those folks, some switched from MORRFlate, and some were first timers. I realized the product resolves the issues I describe below. While I’m not sure if any patents are involved, the EZ-Flate product seemed like a version 2.0 of the MORRFlate product.

MORRFlate

The MORRFlate Quad kit comes with two 13’ hoses connected to a manifold (gauge, connectors, and a lever), and each of the 13’ hoses has a coupler attached to the end. Each of the two 13’ hoses also has a T splitter connected to a 3’ hose which also has a coupler at the end of it. So each of the two 13’ hoses can fill two tires on either side of your Jeep.

Their couplers require you to pull back a collar, push the coupler onto the tire’s Schrader valve, then push the collar forward. Easy to do when it was new, but became harder to do over time. Not sure if corrosion set in, or if some maintenance is required, that customers aren’t told about. It’s a fairly new product so maybe MORRFlate wasn’t aware this is happening.

The T splitters used for the 3’ hoses make coiling the hoses for storage unnecessary difficult. I always felt like the hoses were going to get damaged from kinking it to fit into the carry bag. This made the carry bag bulkier and harder to store in my Jeep.

EZ-Flate

EZ-Flate eliminates the 3’ hose. Each of the two 13’ hoses have a T splitter with an attached coupler. So no need for a 3’ hose. Brilliant simplification of the MORRFlate design. Make the whole unpacking, attaching, detaching, and packing process a lot easier. Their carry bag is significantly smaller, and since the hoses can be easily coiled, it’s easier to stow in the Jeep.

EZ-Flate uses a different coupler design. No collar to pull back on, just press the coupler onto the Shraeder valve and move on to the next tire. Attaches cleanly, no second guessing if it is sealed properly. Once you’re done inflating your tires, grab the coupler body and pull back. The couplers closes once they are disconnected, so no air is lost, same as couplers MORRFlate uses.

Summary

Two good products. EZ-Flate has the design edge. Let’s hope MORRFlate is working to refine their product. Competition is good for everyone.

PS thanks to all who were happy to discuss their thoughts on the EZ-Flate product.

EJS Day 6 – Cameo Cliffs

Today was an easy ride rated 4. The drive to and from the trail was about 25 miles each way. Temperature was in the 30-40 degrees. Though at the 6,000 foot elevation it felt colder, and up there we saw some snow. The distant snow covered mountain range added nice contrast to the trail.

We had about 30 Jeeps and a Durango that had no trouble keeping up. There was one mechanical, a blue TJ that appeared to have an alternator or camshaft issue, depending on who you asked. The driver had to park it and jump into another Jeep, and likely come back in the evening to get it towed in to get it fixed.

Koda had a great time, jumping onto every new person, some kids, and a couple dogs. he was pretty well behaved. I think he likes it here. So glad I brought him with me! He was excited when we got up and prepared for the day’s ride.

Since it was an easier ride, I was able to take lots of pictures. Below are the ones I selected of the bunch.

Tomorrow we will do Fins and Things again. You read that right. I came so close to securing a Golden Spike slot, but I missed out. So I had to select from what was left. No regrets, its a fun ride!

EJS Day 5 – Backwards Bill

A longer, easier trail, with lots to see, it lived up to expectations! There were no hard obstacles, though some would argue lockers are helpful in a few spots. It was a cloudy day in the 30-40s, not too much wind.

The consensus was to air down to 15-16 pounds. I normally air down to 13-14 for tougher rides.

Lots of great views. One day I’ll figure out how to set up a camera that takes shots when I press a button. Here are some I was able to take without taking any risks.

Today’s trail was rated 5. Tomorrow will be even easier.

EJS Day 4 – Gold Bar Rim

Koda taught me how to fly today. I’m just gonna leave this here while I lick my wounds.

Today’s ride is rated 6 and had one obstacle that is notorious for destroying front bumpers. Its called “Waterfall”. It’s a 5 foot high boulder with a 45 degree incline. Two door Jeeps have a harder time than four door Jeeps. As unbelievable as it nay sound, it’s harder to go down than it is to go up.

“Rear bumpers are replaceable.” – Me being positive
Here is an identical Jeep going up Waterfall

Someone captured my pucker moment going down Waterfall. Some folks captured us going up. Once they post to the EJS Facebook page I can grab the clip, with their permission of course.

I didn’t get any pictures of Golden Crack. By the time I recognized it, it was too late. Happy to report my Mopar lift handled it with ease. Here is a video I found on the web.

Tomorrow’s we will do Backwards Bill, which is rated 5.